

3 Ways to Boost Game Sound Quality on a Limited Budget
2026.05.31·Study·19 min readMUZIUM
#game-sound-budget#indie-game-audio#sound-quality#game-audio-outsourcing#low-budget-sound#audio-optimization#sound-design#game-development
Ngon ngữ khác:
English···
Why Is the Indie Developer's Sound Budget Always Tight?
Have you ever experienced finishing up character design, level design, and marketing costs, only to find barely a handful of money left for sound? Or received an outsourcing quote and paused, thinking, "Is this really the price for just one track?" In indie and small-to-mid-sized game development, sound is almost always pushed to the back burner. It's not immediately visible like graphics, and it doesn't generate fun on the spot like gameplay. That's why the decision to "just push it back for now" gets repeated.
The problem is that the gap only becomes tangible right before release. When making a trailer, uploading a video to the Steam page, or hearing playtest feedback that "something feels empty" repeatedly — only then do you realize that sound takes up a big part of the game's impression. By that point, both budget and time are already short.
This article tackles that very issue head-on. It organizes 3 strategies based on indie development realities for elevating the perceived game sound quality even within a limited budget. First is redesigning priorities based on the 'order things are heard,' second is a hybrid allocation mixing outsourcing, libraries, and in-house production, and third is a concentrated investment strategy of pouring budget into signature sounds.
After reading through, you'll be able to reopen your project's sound list and clearly see where to pour more resources and where to cut back. The game sound budget issue ultimately isn't a question of 'how much to spend' but 'where to spend it.'
Method 1: Redesigning Sound Priorities by 'Order of Hearing'
The Top 20% Principle Based on Exposure Frequency
The moment you distribute the sound budget evenly across all assets, the result converges to below average. When you measure how long players actually listen to 100 sound assets, the distribution is typically extremely skewed. In action and platformer genres, a small number of assets — footsteps, jumps, main weapon SFX, UI clicks, the BGM main loop — account for most of the total listening time.
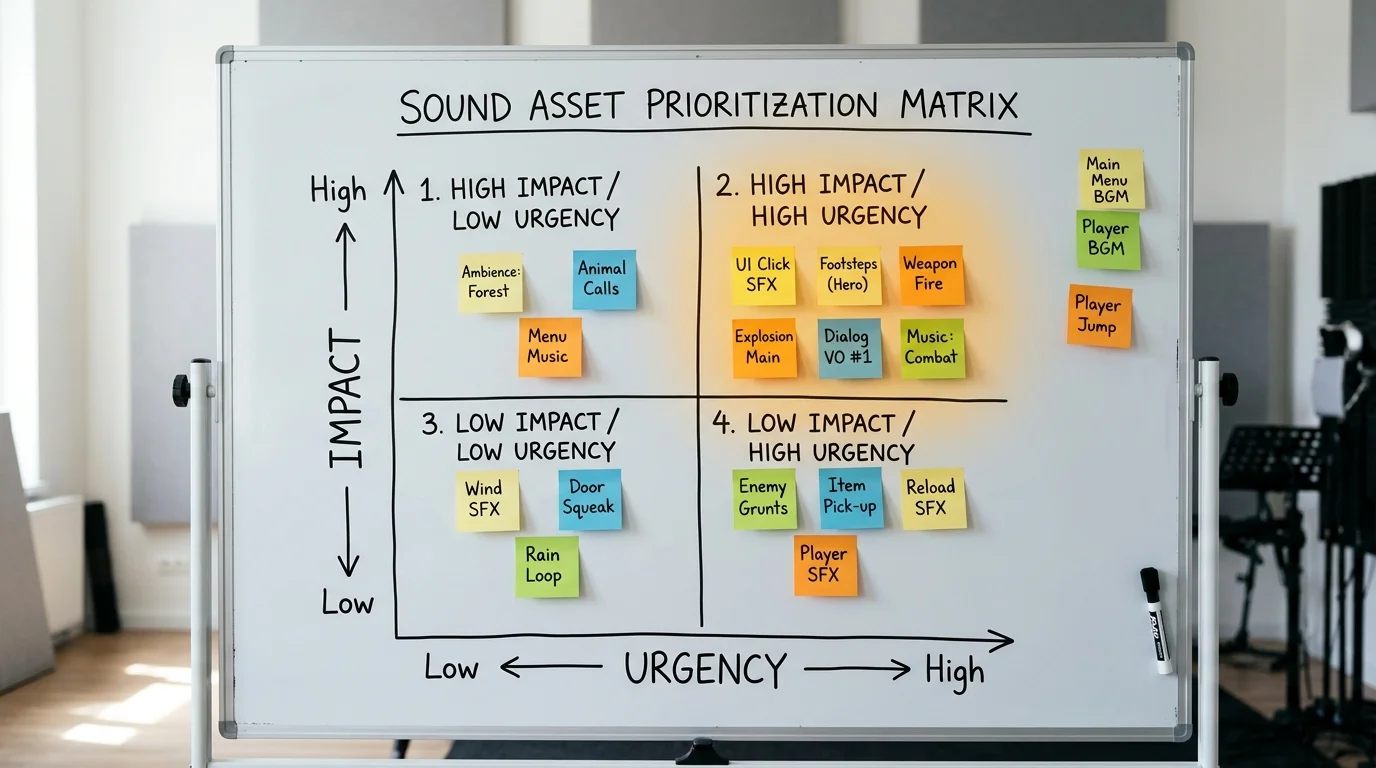
So the first thing to do is create a priority matrix based on exposure frequency. Place 'playback count per unit of play time' on the horizontal axis, 'impact on player decision-making' on the vertical axis, and arrange all sound assets across the four quadrants. Allocate the largest share of the budget to the top-right quadrant (high frequency, high impact). Footsteps, hit sounds, and main skill SFX belong here.
Conversely, assets that play only once or twice during a game — like one-off cutscene effects or ending-only tracks — fall into the bottom-left (low frequency, low impact) quadrant. Lightly processing library assets is enough. This single classification determines roughly half of where your budget will go.
💡 Practical Tip: When building the priority matrix, record a 30-minute play video and mark every sound that appears on the timeline. Mental estimates often differ from actual frequency. Especially in movement-centric games, UI sounds and footsteps appear far more often than expected.
Why Sound Weighting Differs by Genre
Even with the same budget, where you should pour it changes completely depending on the genre. Action games carry a large weight in SFX and impact sounds. Players make several inputs per second, and each input is followed by a feedback sound. In contrast, puzzle games place much more weight on BGM and ambience. Since players linger on a single screen for long periods, the background sound takes on almost the entire responsibility of atmosphere.
For narrative adventure genres, it's different again. Voiceover, the silence between lines, and environmental sound details determine immersion. Even with the same 10 million KRW budget, an action game might allocate a large share to SFX outsourcing, but a narrative adventure should direct that cost to voice directing and environmental sound production. For projects with strong genre characteristics — voice-centric games, music games, horror games — the budget allocation ratios themselves need to be redrawn.
There's a simple way to determine which side your game leans toward. "Write down the 5 sounds a player hears most during an hour of play." A significant portion of the budget should go into those five. If none of those five are candidates for outsourcing or careful production, the priority design was wrong from the start.
💡 Practical Tip: Pick 3 reference games in a similar genre and play each for 30 minutes, roughly estimating their sound weighting. Try distributing 100 points across 5 categories — BGM, SFX, UI, ambience, voice — and you'll get a sense of where your own project should invest.
Common Mistake: Treating All Sounds Equally
The most frequent mistake in low-budget projects is trying to bring every SFX up to the same quality. With the mindset of "might as well make everything good," distributing outsourcing rates evenly across all assets results in every sound sitting at 'average.' Average doesn't leave an impression.
Let's compare with the following hypothetical scenario. Team A distributes 5 million KRW evenly across 50 SFX outsourced assets, creating them at 100,000 KRW each. Team B pours 4 million KRW into the 10 most frequently heard SFX, producing them at 400,000 KRW each, and handles the remaining 40 by processing royalty-free library assets within 1 million KRW. The total budget is identical, but the impression players receive from Team B is far stronger. The quality of the most frequently heard sounds lifts the overall impression of the game.
So once you've built the priority matrix, the next step is to ask "Is this sound worth 3 to 5 times the average rate?" for each asset. It's healthy when only a small number of assets can be answered with yes. The moment you exceed that ratio, you fall back into the trap of averaging.
Another common mistake is spending budget on increasing the number of BGM tracks. A 3-track intense soundtrack lingers in memory longer than a 10-track ordinary one. Going with fewer tracks but higher per-track quality is a frequently recommended direction in low-budget sound production.
Method 2: A Hybrid Allocation Strategy Mixing Outsourcing, Libraries, and In-House Production
The Realistic Structure of Game Audio Outsourcing Costs
Before considering outsourcing, you need to understand the cost structure first. Game audio outsourcing costs are usually priced in three units: per-track rate (single assets like BGM or jump sounds), per-minute rate (BGM and cinematic music), and package rate (bundled work like UI sound sets or weapon sound packs).
As an example of ranges frequently seen in domestic indie projects, an entry-level composer's per-BGM track rate starts from a few hundred thousand KRW, and a set of signature SFX from an experienced sound designer is often priced anywhere from a few hundred thousand KRW to several million KRW per track. However, since actual quotes vary greatly depending on region, contractor experience, deadline, taxes, and contract practices, please use the above figures only as a comparison baseline, not as a market price list. It's also worth remembering that even for the same deliverable, the rate goes up as the 'scope of usage rights within the game' expands.
There are three traps indie teams often fall into. First, not clarifying the usage scope from the beginning, leading to additional costs after release for trailers, OST sales, or use in sequels. Second, not setting a cap on the number of revisions, causing costs to balloon during the direction stage. Third, requesting "make it cool however you want" without references, then wasting both time and money on rework when the result misses the mark.
The rights structure isn't simply divided into 'exclusive or not.' Items like exclusive usage rights, derivative copyrights, OST sales, advertising use, sequel use, and provision of original session files are each separate negotiation items, and the rate gap depends on which items are included. It's safer to organize them as an item-by-item checklist at the purchase order stage.
💡 Practical Tip: Before signing an outsourcing contract, organize (1) usage scope (main game/trailer/OST sales/sequel), (2) revision cap (typically set to 2-3 times), (3) delivery format (WAV 24bit + original session), and (4) payment schedule (50/50 or 30/40/30, etc.) into a one-page purchase order to prevent disputes.
Royalty-Free Libraries: Processing Is the Key
While using library assets as-is isn't recommended, processing them is closer to the standard workflow in indie sound production. Real resources like Freesound, the Sonniss GDC Game Audio Bundle (a large sound pack distributed free each GDC season), Epidemic Sound, and Soundly are frequently used. Pricing ranges from free to monthly subscriptions, so you can choose according to project scale. However, since distribution availability and license terms change annually and by service, always check the latest terms before use. In particular, Freesound has varying CC0, CC-BY, or NC status per file, so file-level verification is essential for commercial projects.
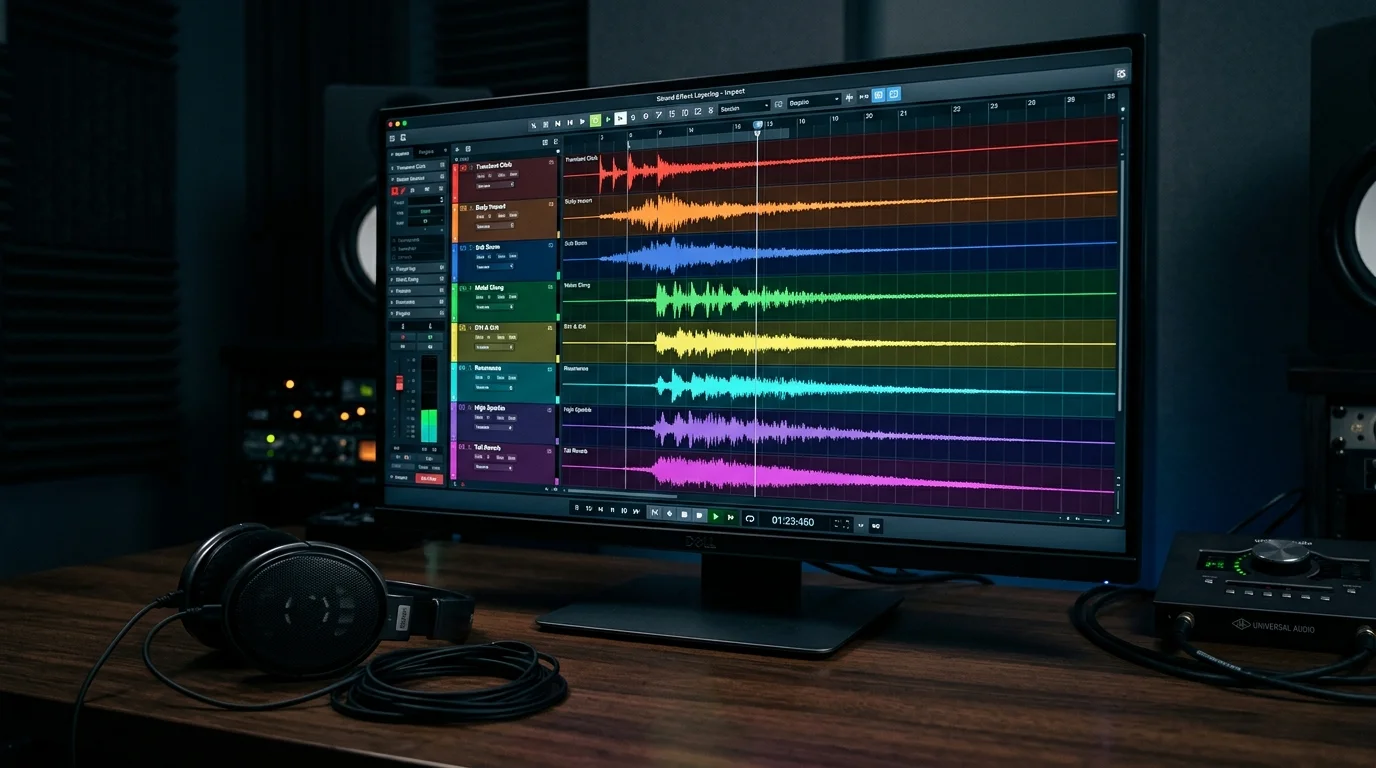
Here's the 3-step processing method to make library assets "my game's sound." First, layering. Build a single effect by stacking two or three library assets. For example, for a sword swing, layer a 'whoosh' track, a 'metal scrape' track, and a 'low impact' track to create new texture.
Second, pitch and time modulation. Even the same footstep sample loses its repetitive feel when you vary the pitch by ±10% and subtly change the playback speed. Third, spatial processing. Applying reverb and EQ to match the game's world gives the same sound a spatial quality that nearly hides its library origin.
Just going through these three steps removes the trace of 'familiar, like I've heard it in another game' from library sounds. License verification is also essential. Since CC0, CC-BY, and commercial licenses each have different requirements, you need to organize a license sheet before release.
💡 Practical Tip: Organize library assets into category-based folder structures from the start, and record 'source-license-processed status' as metadata for each file. This prevents accidents where you lose days verifying licenses right before release.
How to Decide the In-House Production Scope
The last axis of the hybrid strategy is in-house production. Outsourcing everything is expensive, and making everything yourself leaves you short on time. So a commonly used allocation formula in indie development is "Foley and ambience in-house, signature sounds and main BGM outsourced."
The reasoning is simple. Foley like footsteps, fabric rustle, and picking up objects can be made well enough with just a smartphone recorder and a quiet room, and since the volume is large, outsourcing accumulates significant costs. Ambience is similar. Environmental sounds like wind or café chatter can achieve sufficient quality from free libraries or direct recording.
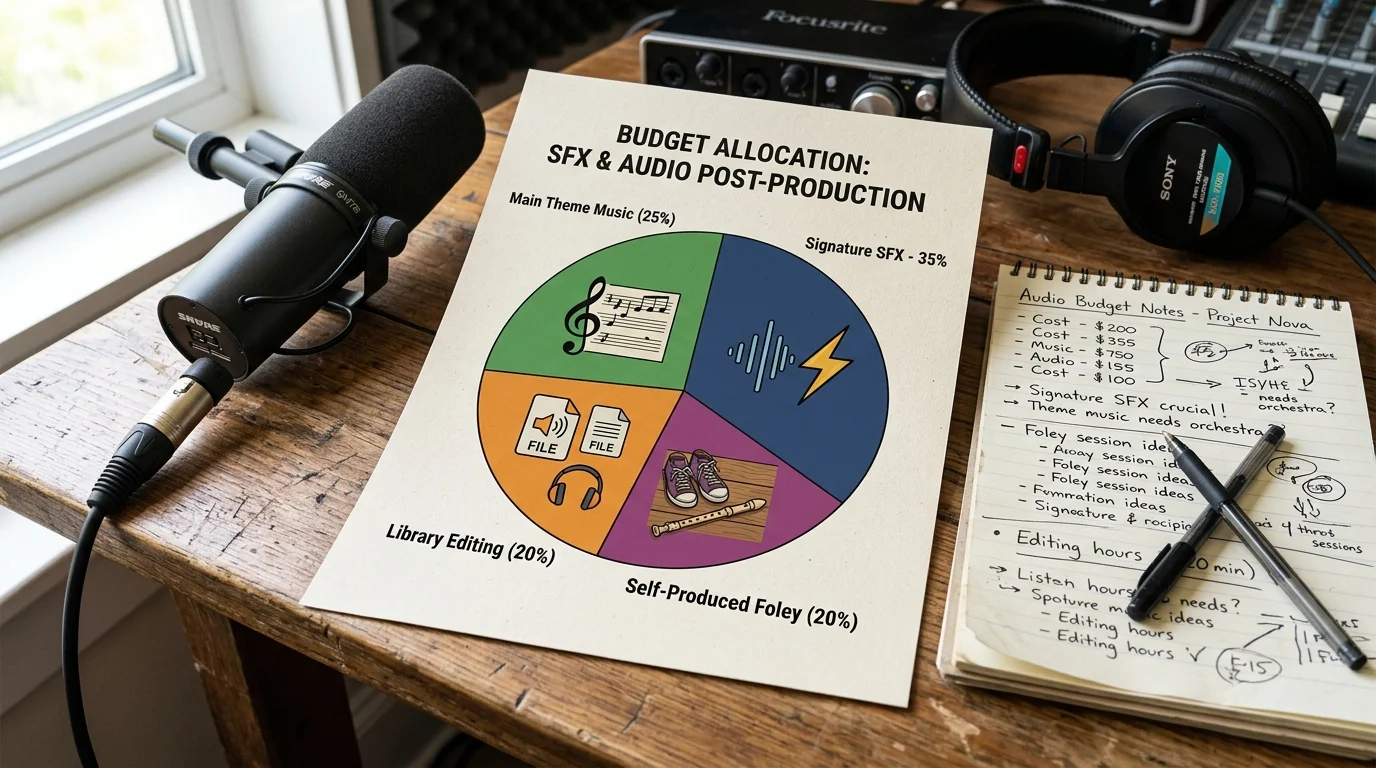
On the other hand, main theme BGM and signature SFX are different. Since composing ability, mixing experience, and a feel for signature timbre all need to combine, careful production via outsourcing makes a big difference compared to in-house production. So an effective allocation is concentrating most of the outsourcing budget on 1-2 main themes and 5-10 core SFX.
Let's compare Before/After with the following hypothetical scenario. Before: Spending all 10 million KRW on outsourcing 10 BGM tracks. 1 million per track, average quality. After: 3 million for the main theme, 2 million for the boss battle theme, 3 million for a package of 10 signature SFX, 0 for in-house Foley and ambience, and 2 million for processing library BGM. The latter leaves a far stronger 'memorable' sound impression with the same budget.
Method 3: Pour Budget into the 'Signature 3' to Lift Perceived Quality
What Is a Signature Sound?
Signature sounds are core audio etched into player memory that create the game's identity. The 'Signature 3' frequently used in indie games are typically three categories: main theme BGM, representative action SFX, and decisive feedback sound. The main theme determines the game's first impression on the title screen and trailer. The representative action SFX is the sound of the most frequently used ability or action, setting the tone of the play experience. The decisive feedback sound is a short effect at reward moments like level clear, boss defeat, or item acquisition.
There are indie game cases that many players remember as identity elements. Hollow Knight's melancholic main theme, Celeste's dash sound and strawberry pickup sound, Hades' weapon-differentiated impact feel — these are representative examples accepted as part of game branding. What these sounds have in common is that even one or two listens are enough to identify which game and which moment.
The reason signature sounds are powerful is repeated exposure. The main theme is heard every time the player launches the game, the representative action SFX is heard hundreds of times per session, and the decisive feedback sound is heard at the most emotionally heightened moments. Pouring budget into these three is investing in the sounds players will remember most often and most strongly.
The 5-Step Workflow for Producing Signature Sounds
Signature sounds don't rely on spontaneous inspiration alone. The following 5-step workflow is frequently used in indie practice.
Step 1: Concept Definition. Compress the game's core emotion into 3 keywords. Example: "loneliness, resolve, small hope." These keywords determine the main theme's chord progression, instrument selection, and tempo.
Step 2: Reference Collection. Gather 3-5 existing sounds that express the same emotion well. They can be from other games, films, or albums. Having concrete references at the outsourcing direction stage greatly reduces communication misunderstandings and shortens rework cycles.
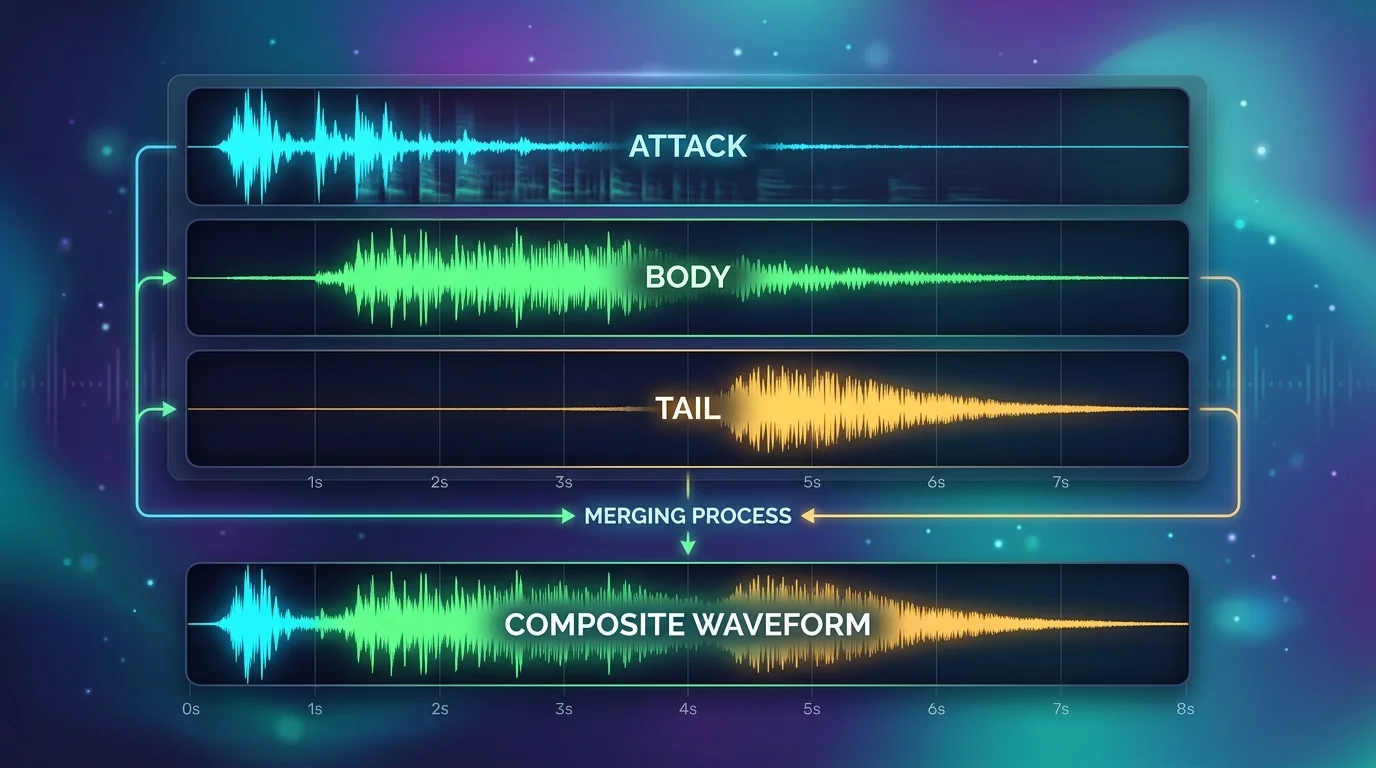
Step 3: Layer Design. One commonly used design method for signature SFX is structuring sounds into attack layer (first impact), body layer (main timbre), and tail layer (reverberation). This structure is one of the key things separating simple library sounds from signature sounds. However, for minimal UI sounds, 8-bit/retro sounds, or stylized synthetic sounds, a single source can be more appropriate.
Step 4: Outsource/In-House Decision. Only once concept, reference, and layer design are complete should you decide on outsourcing or in-house. If composing ability is lacking, outsource; if you have sound design experience, in-house. The criterion is "Can you reach a passing standard through 5+ revisions within a month?" If not confident, outsourcing is the right call.
Step 5: In-Game Mix Verification. Put the completed sound into the game engine and verify the balance when played simultaneously with other BGM and SFX. Sounds that sounded good in isolation often get buried or stick out in-game. Without this verification, signature sounds can't play their role.
💡 Practical Tip: When collecting references, don't just say "this kind of feel" — point out by the second, like "the bass line in the 0:42~0:58 section and the percussion pattern at 1:15." The accuracy of information given to outsourced composers determines the quality of the deliverable.
Lifting the Remaining Sounds 'Above Average'
If you concentrate your budget on the Signature 3, how do you handle the rest? The key is the 'sound family' concept. It's a method of varying a single well-made source to create multiple assets.
For example, if you have one well-made magic casting sound, you can derive 3 magic SFX — fire, ice, and lightning — by adjusting its pitch. Just changing reverb amount and EQ settings, you can create indoor, outdoor, and cave versions. A single carefully produced asset expands into 5-10 derivative assets.
The reason this method works is because timbre consistency is the core of game sound design. When all magic varies from the same timbre family, players unconsciously feel "this game's sound identity." Conversely, if each spell uses sounds from different libraries, each one might be fine individually but gives a scattered impression as a whole.
Another method is modular BGM. From a single main theme track, separate melody, bass, and percussion to play a calm version (bass + pad only) during normal moments, the full version (all tracks) in combat, and a variation version (enhanced percussion) for boss fights. You can cover 3-4 different moods at the production cost of one track, making it a frequently used cost-saving technique in indie game audio.
Optimizing Audio & Avoiding Common Mistakes to Protect the Budget to the End
Audio Optimization Basics
Even if you've made great sounds, building them in incorrectly explodes file size, memory, and loading time, making the game itself heavy. That's where audio optimization comes in.
Sample rate and bit depth selection comes first. Match your project's output sample rate and engine settings, but BGM often starts at 44.1kHz/16bit as a baseline. Some console and video pipelines use 48kHz as default, so it's safer to check the target platform settings first. For short, simple effects like UI clicks, lowering to 22.05kHz often makes little audible difference, while signature SFX should retain their original sample rate — this kind of tiered application is effective. Uniformly setting all assets to 48kHz/24bit only increases file size while keeping the listening experience the same.
File format also matters. Unity, Unreal, Wwise, and FMOD all provide default compression options. A general starting point is uncompressed PCM or ADPCM for short SFX, and Vorbis or MP3 compression for long BGM. Compressing short SFX to Vorbis can burden performance with decoding overhead, so it's most accurate to profile in your actual build before deciding.
Loading strategy is often overlooked. Keeping a cutscene music that plays only once resident in memory wastes RAM. Conversely, reading frequently played footsteps from disk every time increases disk I/O. The resident vs. streaming decision should be made per asset. In projects with a large audio share, this single optimization step can meaningfully reduce build size, and especially switching BGM to Vorbis streaming alone often makes a big difference.
Cost-Saving Methods in the Mixing/Mastering Stage
If your budget can't afford hiring a professional mixing/mastering engineer, you can achieve passing-grade results with free or low-cost tools. Real tools like ReaPlugs (a free plugin bundle included with Reaper), TDR Nova (free dynamic EQ), and Voxengo SPAN (free spectrum analyzer) are frequently used among indie sound workers.
Bus grouping is the technique to apply first. Don't send all sounds to a single master bus — divide them into BGM bus / SFX bus / UI bus / voice bus. You can collectively adjust volume and EQ on each bus, reducing mixing time and making it easy to implement in-game sound options (separate BGM volume, SFX volume).
Dynamic sidechaining is particularly useful in voice-priority games. It's a technique that automatically lowers BGM volume while dialogue is playing. It eliminates the time spent manually drawing volume automation every time.
Reference track utilization is also important. In the mastering stage, load a well-made commercial game's sound into the same session and compare loudness and EQ balance. Problems like "my game's BGM is suddenly quiet, or SFX stick out excessively" are often caught with one reference comparison. Loudness targets themselves vary by platform and use case. Console/broadcast standards often use around -23~-24 LUFS, while -18~-14 LUFS is discussed for mobile, web, and trailer/streaming environments. However, these aren't absolute standards, so the safest approach is to determine the final target by synthesizing target platform requirements, dialogue clarity, dynamic range, and real-device testing.
💡 Practical Tip: After finishing the mix, listen on all three environments: smartphone speaker, earphones, and standard monitor speakers. Since indie game players have diverse listening environments, a mix that's only good on one environment falls apart on others.
5 Mistakes Indie Developers Often Make
Finally, here are the 5 mistakes that burn through the sound budget fastest.
1. Starting sound work last. If you start sound two months before release, outsourcing schedules don't fit and there's no time to run revision cycles. We recommend inserting placeholder sounds at the alpha stage at the latest, or ideally from the prototype stage. Placeholder sounds can be borrowed from libraries, and later replaced with signature sounds.
2. Lack of version control. Once sound files start getting names like 'final_v3_real_FINAL.wav,' it's already too late. Without establishing asset naming conventions and folder structures from the beginning, accidents where no one knows which file is the latest right before release become likely.
3. Loudness too high. If you push every sound near 0dBFS thinking "louder is better," clipping occurs when multiple sounds play simultaneously and listening fatigue worsens. Don't push individual assets to 0dBFS — secure enough headroom at the mix bus and master output. Setting about 6dB of headroom at the master as an example value is relatively safe against simultaneous signals.
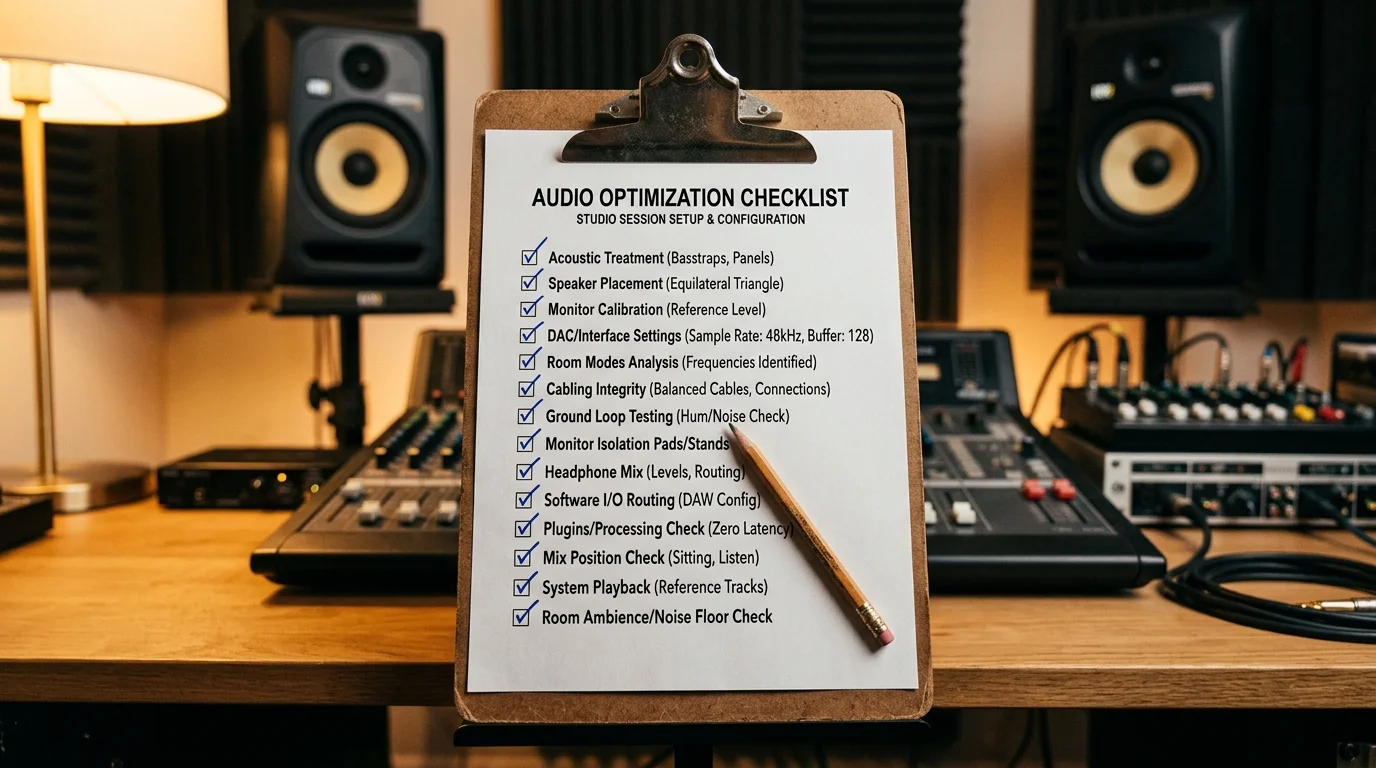
4. Ignoring room environment. Mixes made in a typical living room are highly likely to have distorted low and high ends. If room correction is difficult, at least cross-verify by working in parallel with headphones and speakers.
5. Not incorporating playtest sound feedback. If you dismiss tester feedback with "sound is subjective," the same complaints will repeat in post-release reviews. Feedback like "the SFX is too loud/quiet," "the BGM is monotonous," or "a specific sound is annoying" must be treated as data. If 3 out of 5 people make the same complaint, that's objective.
💡 Practical Tip: Pre-install volume sliders by sound category in the playtest build. When testers can directly lower the category that bothers them and report that value, you can capture "where the problem is" as data. This single feature greatly improves the accuracy of sound feedback.
A Sound Budget Strategy You Can Apply Starting Today
Compressed into three lines:
Redesign the budget by putting the sounds players hear most often onto the priority matrix first. Hybridize outsourcing, library, and in-house production to extract more value from the same budget. Pour budget into the Signature 3 (main theme, representative action SFX, decisive feedback sound) to create a sound identity etched into player memory.
Here's one action you can take right now. Open your project's sound asset list as a spreadsheet, and write down 'expected playback count per unit of play time' for each asset. Bold the Top 10, then calculate what % of the current budget is going into those 10. If the share falls short of half, that's a signal you need to reassess the allocation itself. The first thing you need to work on today becomes clear right there.
A limited budget doesn't equate to low sound quality. The courage to decide where NOT to spend makes a bigger difference than the decision of where to spend. Focus on amplifying through sound the single strongest emotion your game possesses. Wishing you the best on your journey to creating great game sound.