

Cubase Pro 13 Tutorial 1-3: Creating Your Own Template
2024.04.13·Steinberg Cubase·6 min readMUZIUM
Also available in:
English···

Go to the previous lesson
In the previous lesson, I introduced how to create a project. I showed you how to choose a template to create a project, and how to create and manage a project folder.
This time, we'll look at how to create your own template. The goal is to set up the most basic configuration.
Opening the Cubase Empty Template
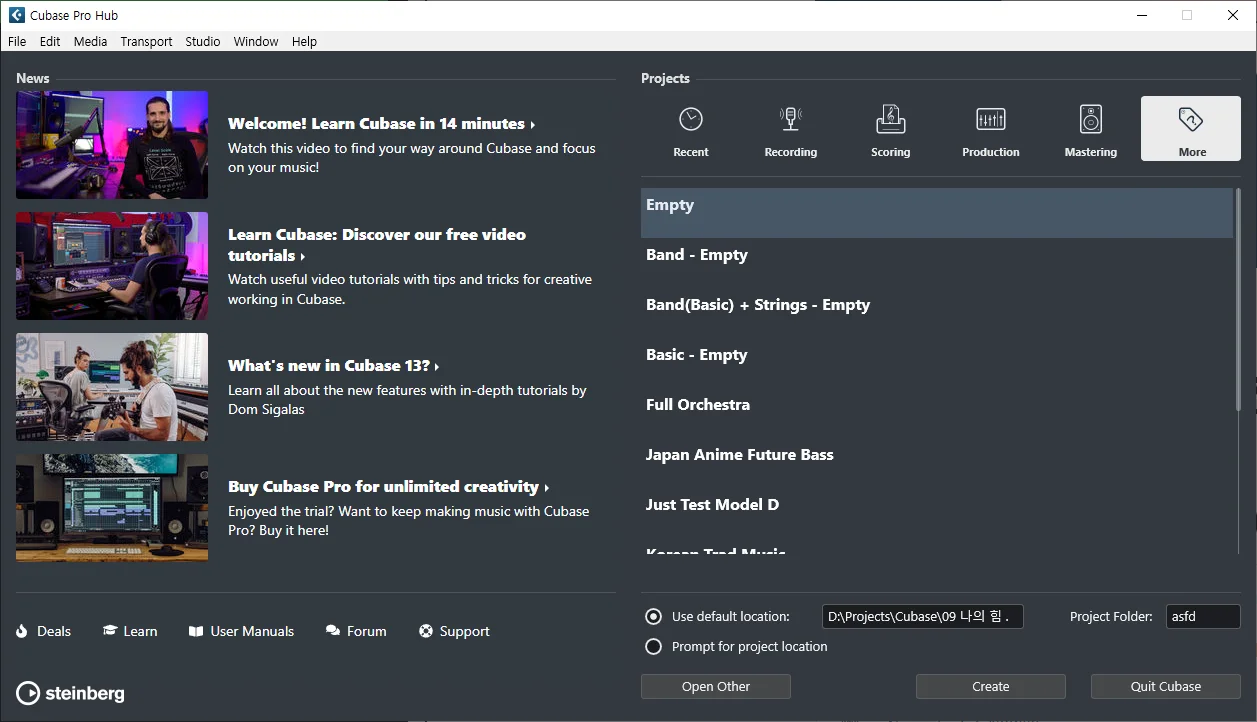
Launch Cubase, and in the Cubase Hub, go to the More tab and create a project using Empty. Since we're only going to create and save the template without saving a separate project, you can set the project folder path and name to anything you like for now.
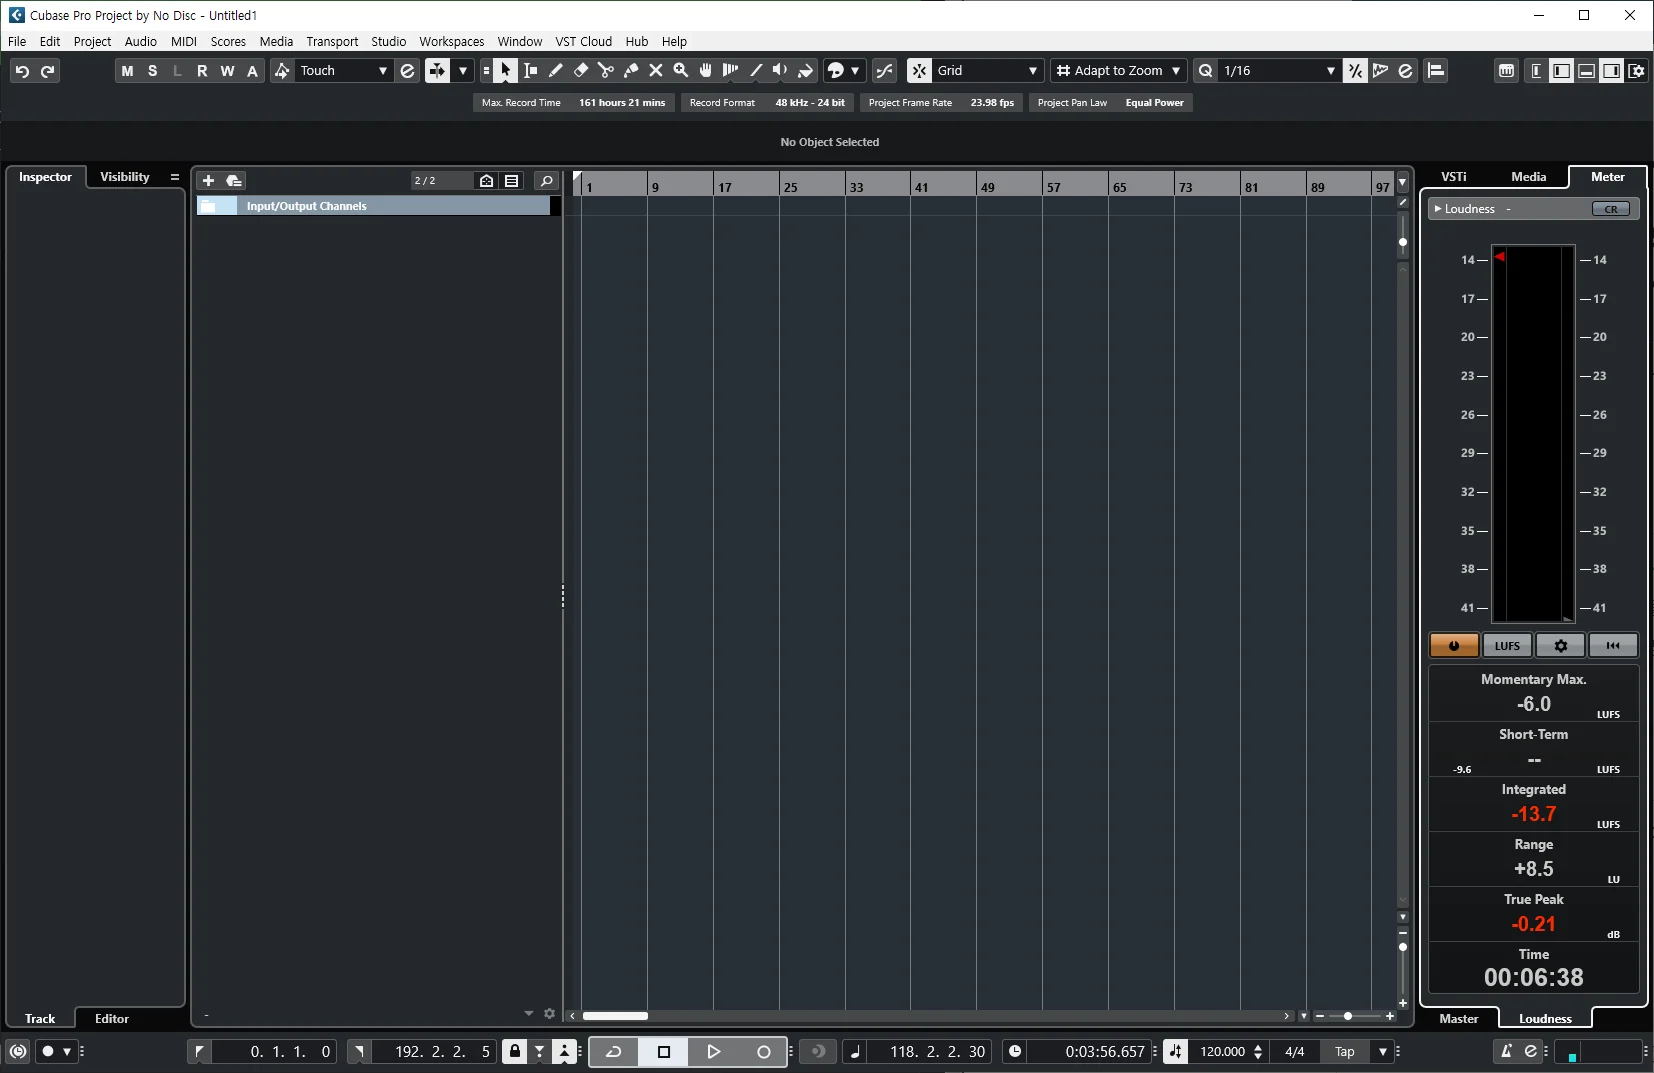
A project that appears completely empty will open. However, there is exactly one thing present.
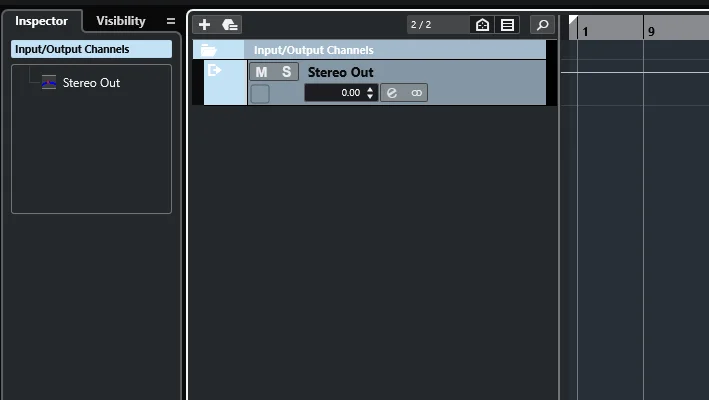
Do you see the small folder labeled Input/Output Channels on the screen? Clicking this folder will reveal a track called Stereo Out.
Stereo Out
This Stereo Out is the track where all audio in Cubase is ultimately output. Unless you're in a situation where you're listening through multiple speakers or headphones via multiple outputs, you can leave just one configured. However, the Stereo Out track is essentially something you'll never need to touch. You can use it like a regular track — adjusting Volume, Mute, Solo, Equalizer, and so on — but it's best to avoid directly manipulating this track. There are several reasons for this, but the biggest one is that it affects all the sounds used in the project. You won't be able to hear anything beyond what the Stereo Out settings allow. Since we won't be touching it anyway, let's go ahead and delete it. Selecting the Input/Output Channels folder and deleting it will also delete the Stereo Out track inside it.
You can right-click the folder and select Remove Selected Tracks, or press the shortcut Shift + Del to delete it.
Creating Cubase Tracks
There are basically two ways to create any type of track. You can click the + button in the upper left to open the Add Track window and select the track type, or you can right-click in the empty space on the left side and choose the track type you want to create.
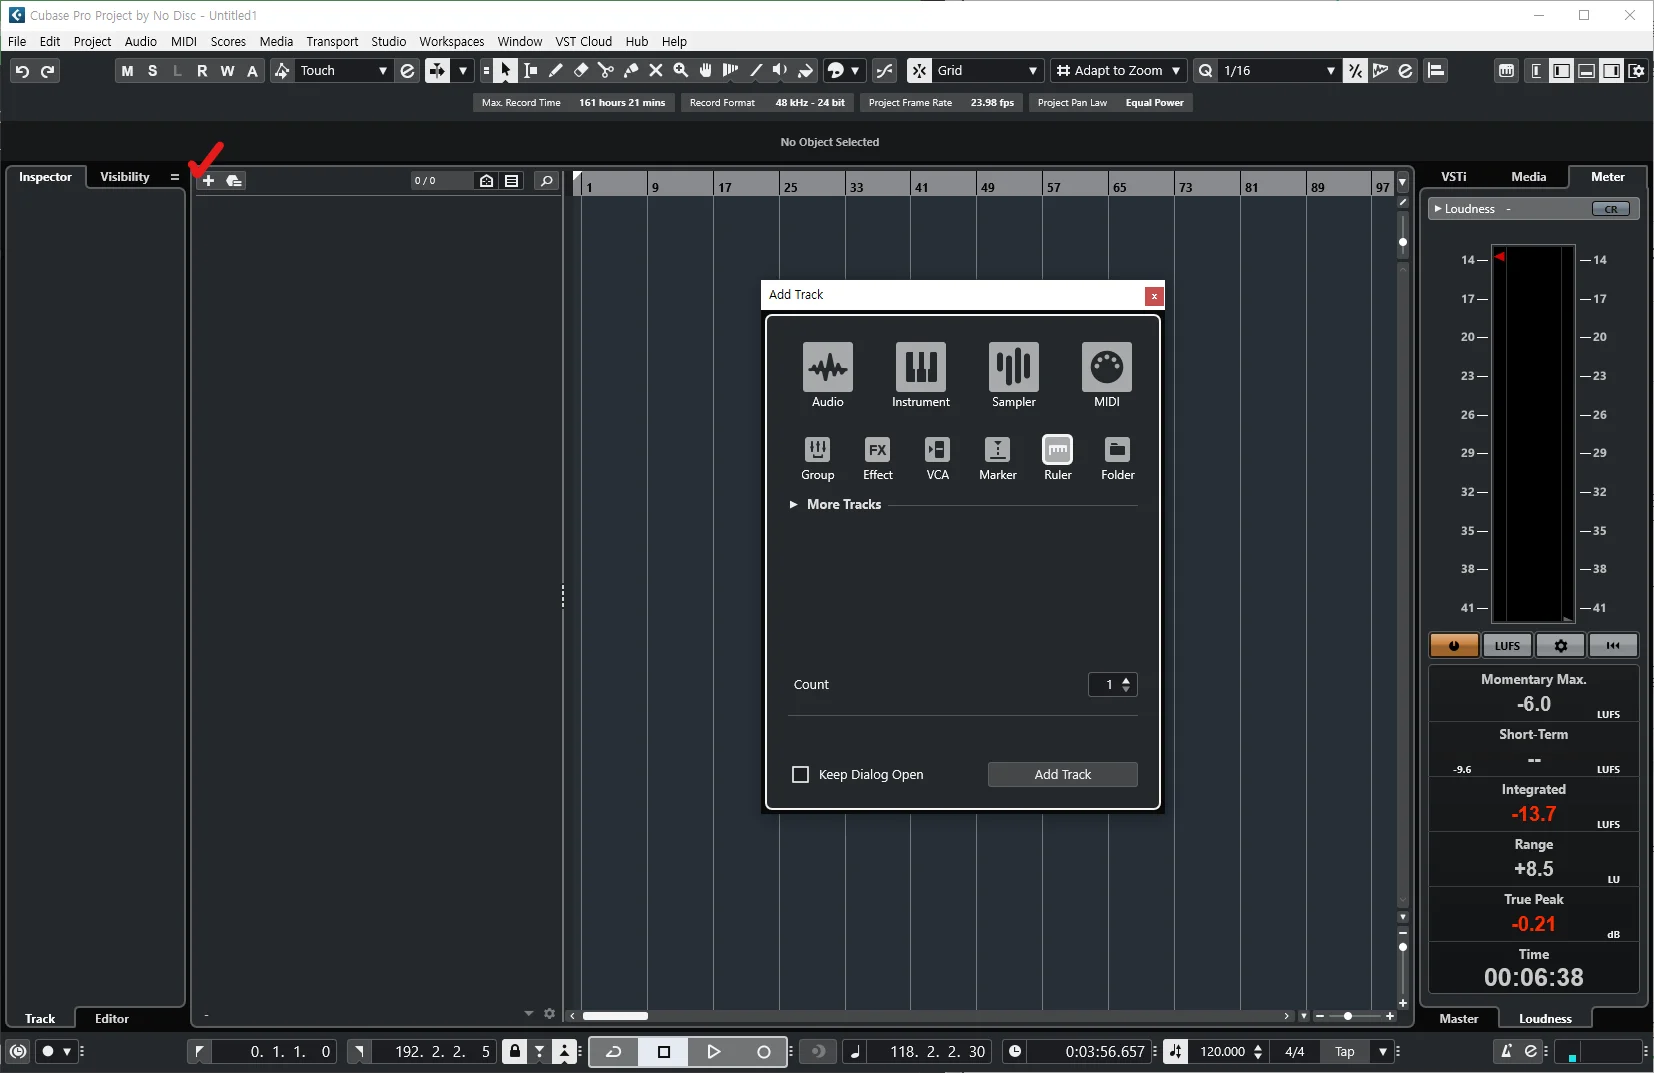
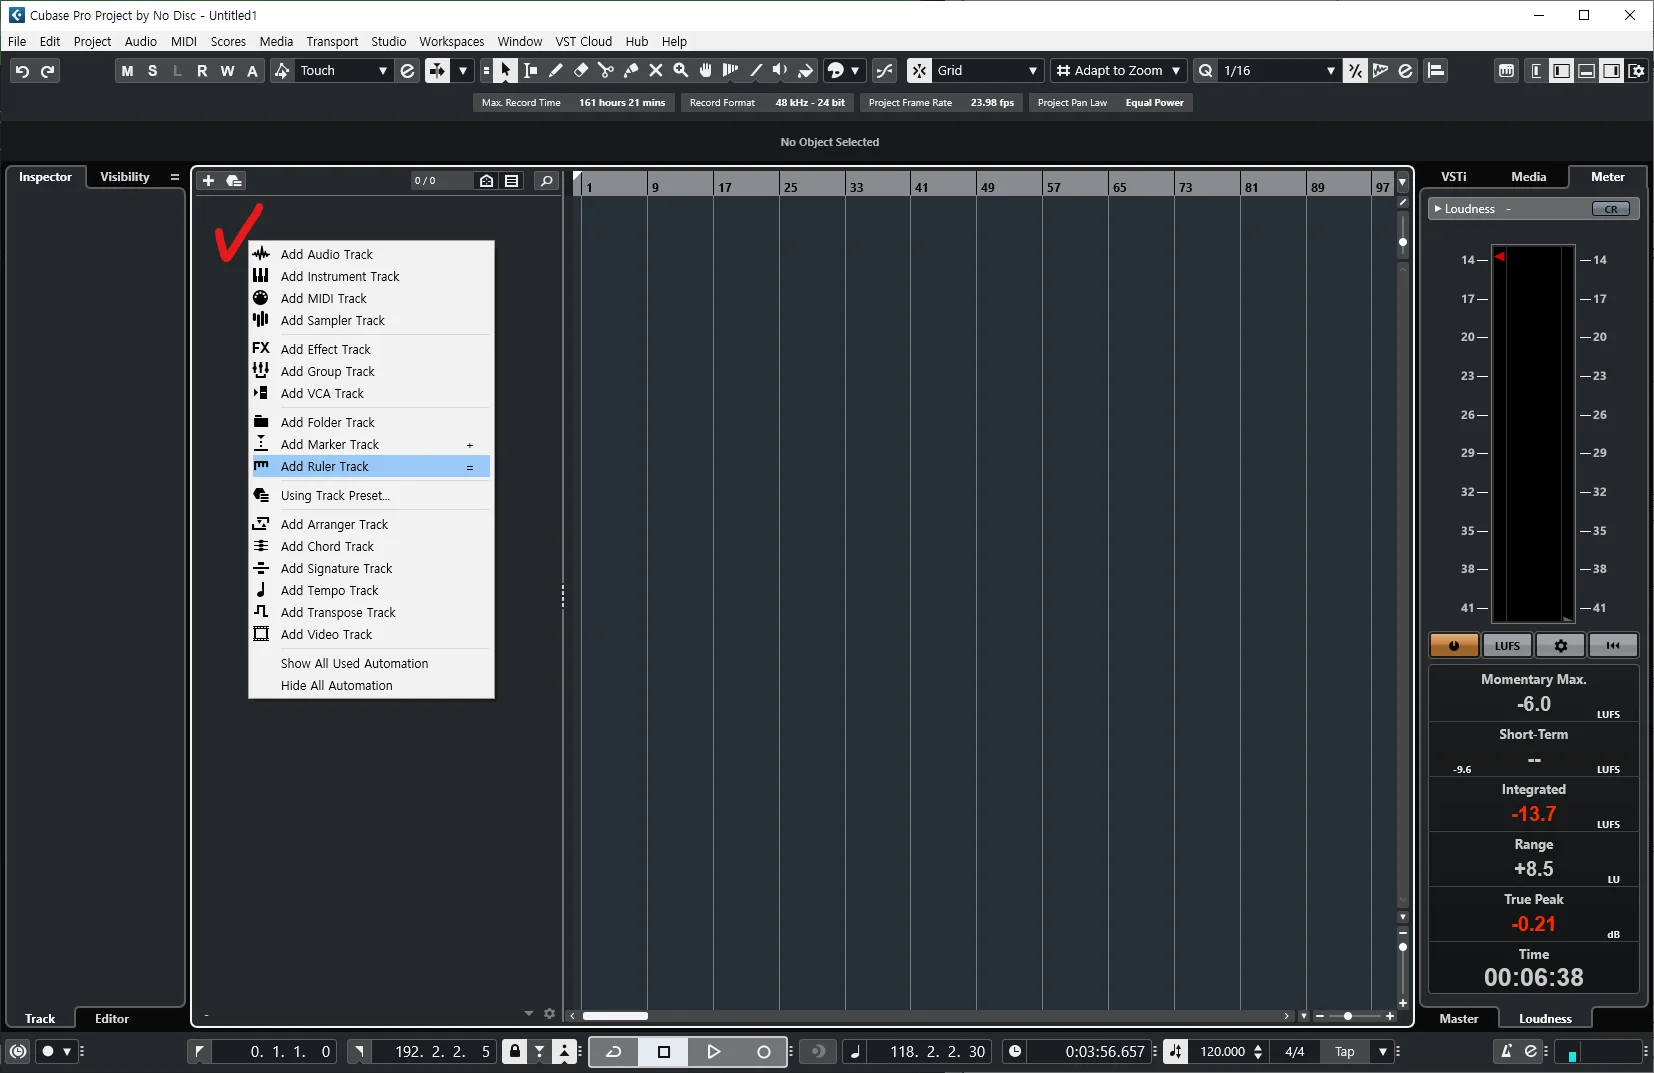
Creating a Ruler Track
Let's start by creating a Ruler Track. I've assigned the shortcut key to =, and I'll write a separate post about how to configure shortcut keys in the future.
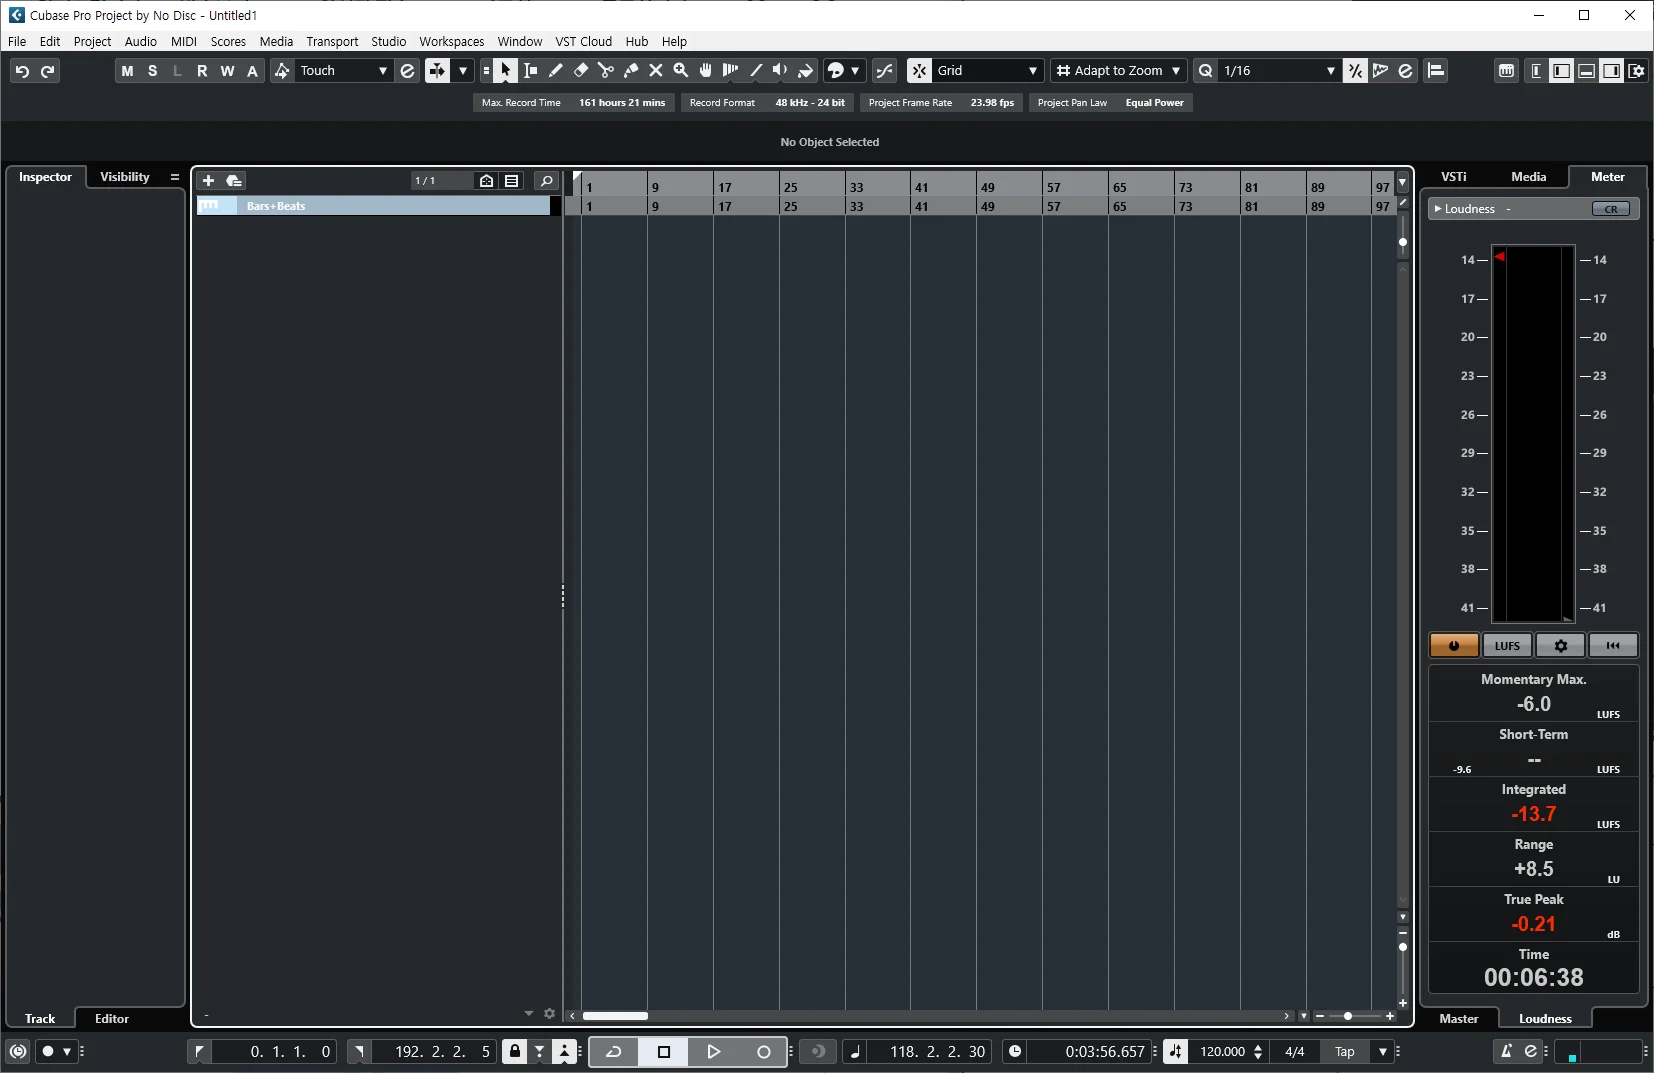
After creating the Ruler Track, I can see that it generated something identical to the ruler Grid at the top. But there's no need to have two of the same thing, right? You can change the setting of either the top ruler or the Ruler Track — I'll go ahead and change the Ruler Track's setting.
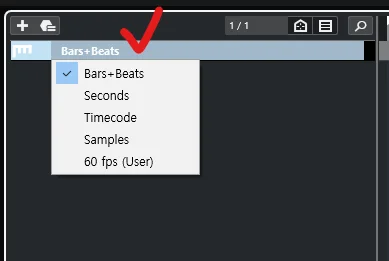
Clicking where it says Bar + Beats will bring up a list allowing you to select the type of ruler.
Seconds and Timecode both display time in minutes and seconds. Timecode shows it in 'hours:minutes:seconds:milliseconds' format. I'll select Timecode.
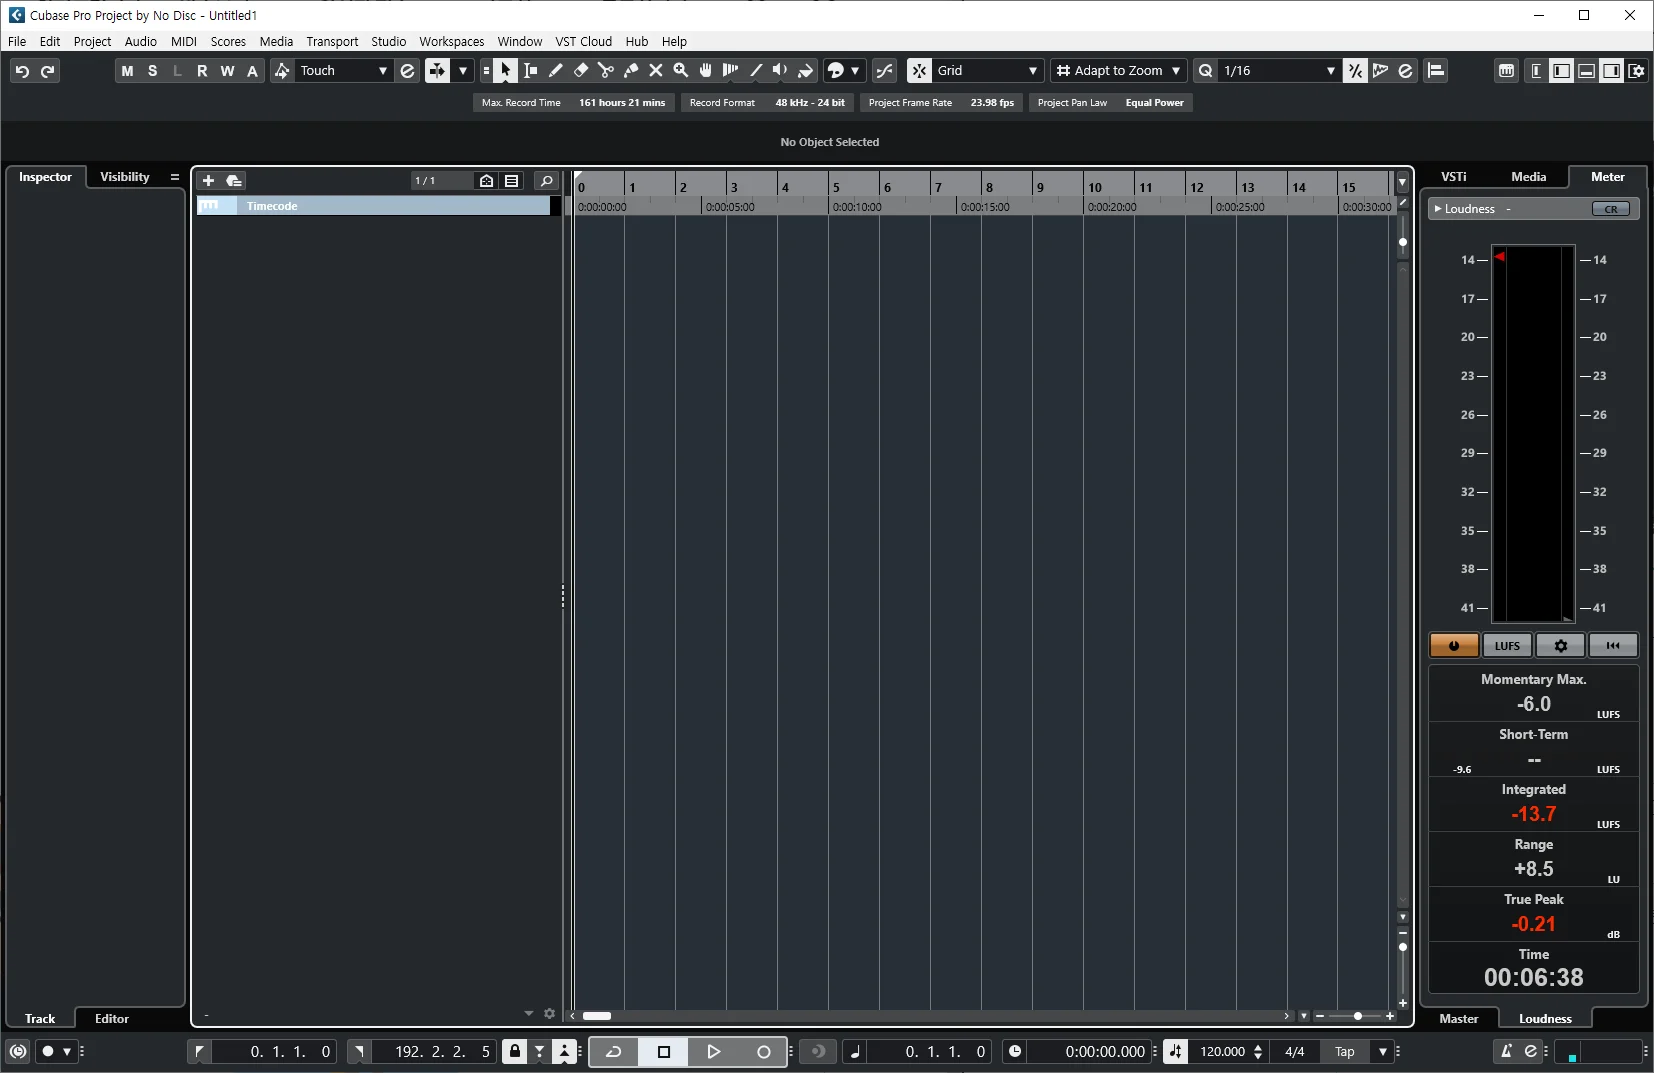
Now you can see both different ruler types displayed together in a convenient way.
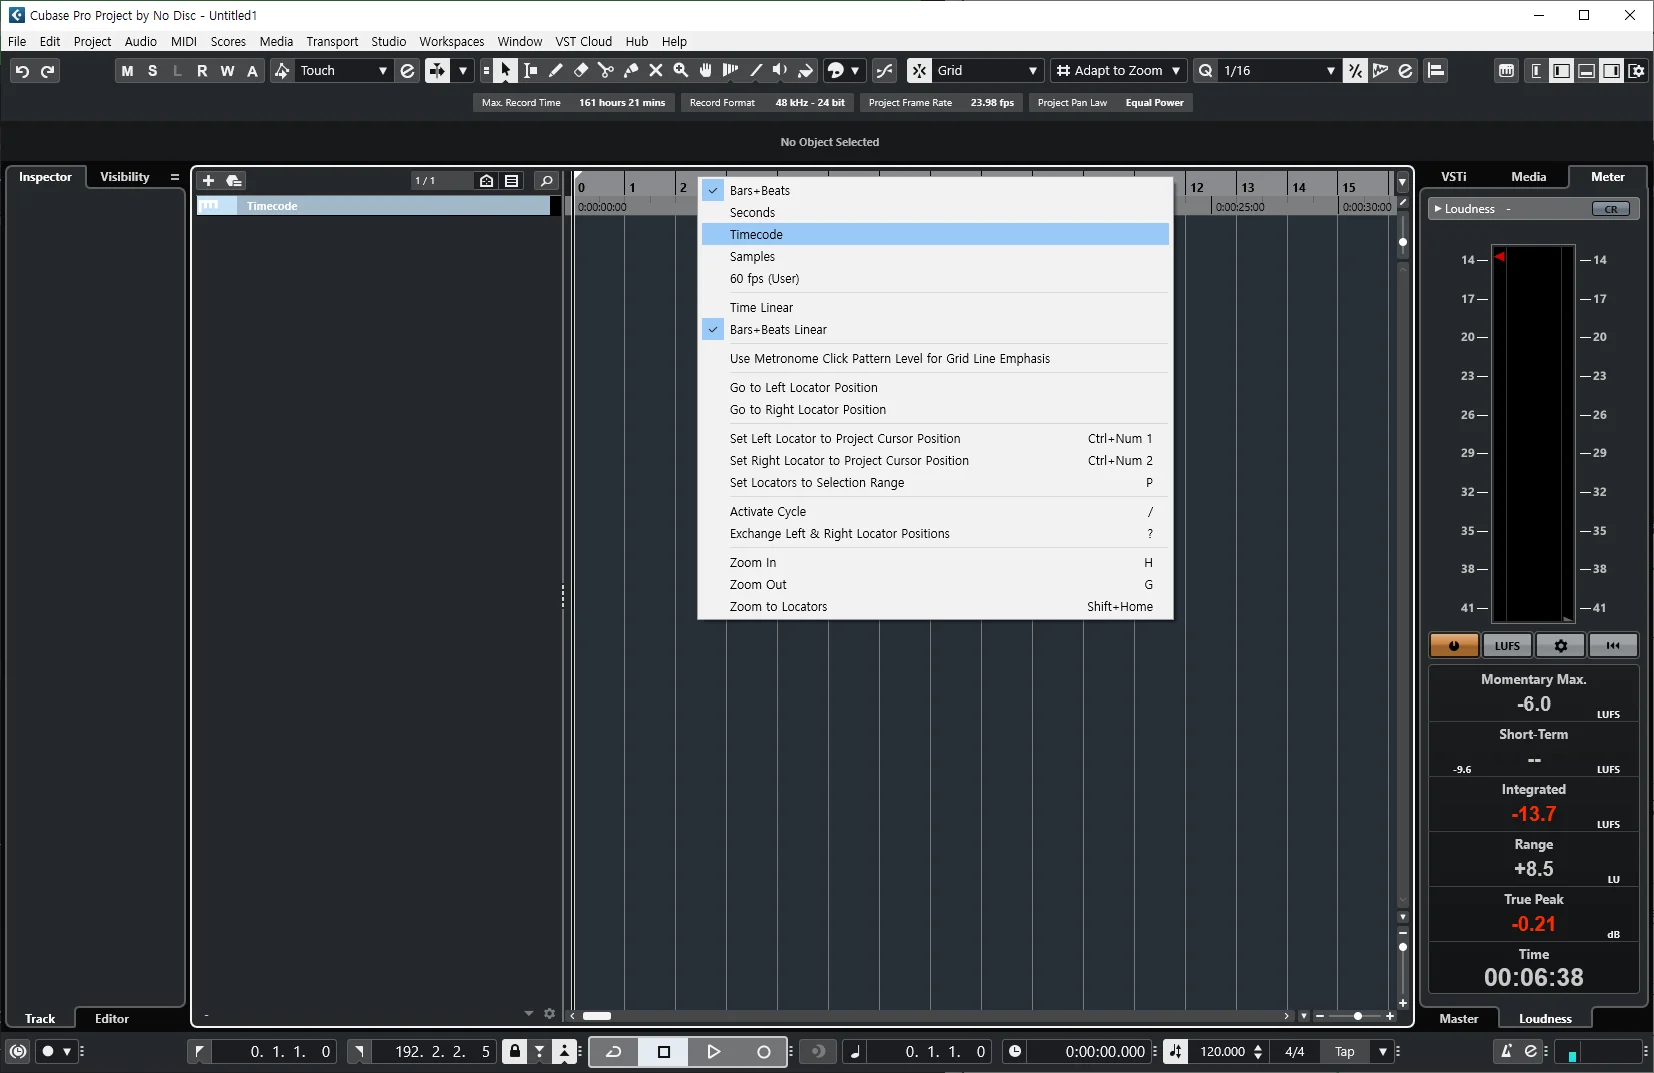
Conversely, you can also adjust the ruler at the top. Right-clicking it lets you set it to any option, just like with the Ruler Track. However, note that the Grid displayed in the Cubase project will also change from Bar+Beats to Timecode accordingly. If you don't want that, it's better to change the Ruler Track's setting instead.
By creating a Ruler Track this way, you can easily distinguish and view both bar-based and time-based rulers at a glance.
Creating a Marker Track
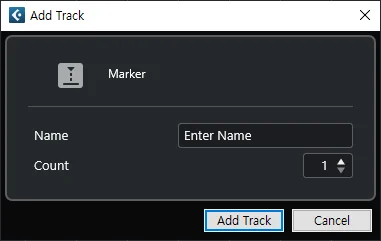
Just like we created the Ruler Track, let's create a Marker Track as well. Unlike the Ruler Track, a window will appear asking you to enter a track name. Since Cubase Pro allows you to create multiple Marker Tracks, you have the option to give it a name. However, since most people only use one, you don't necessarily need to enter a name — just press Add Track or the shortcut Enter.
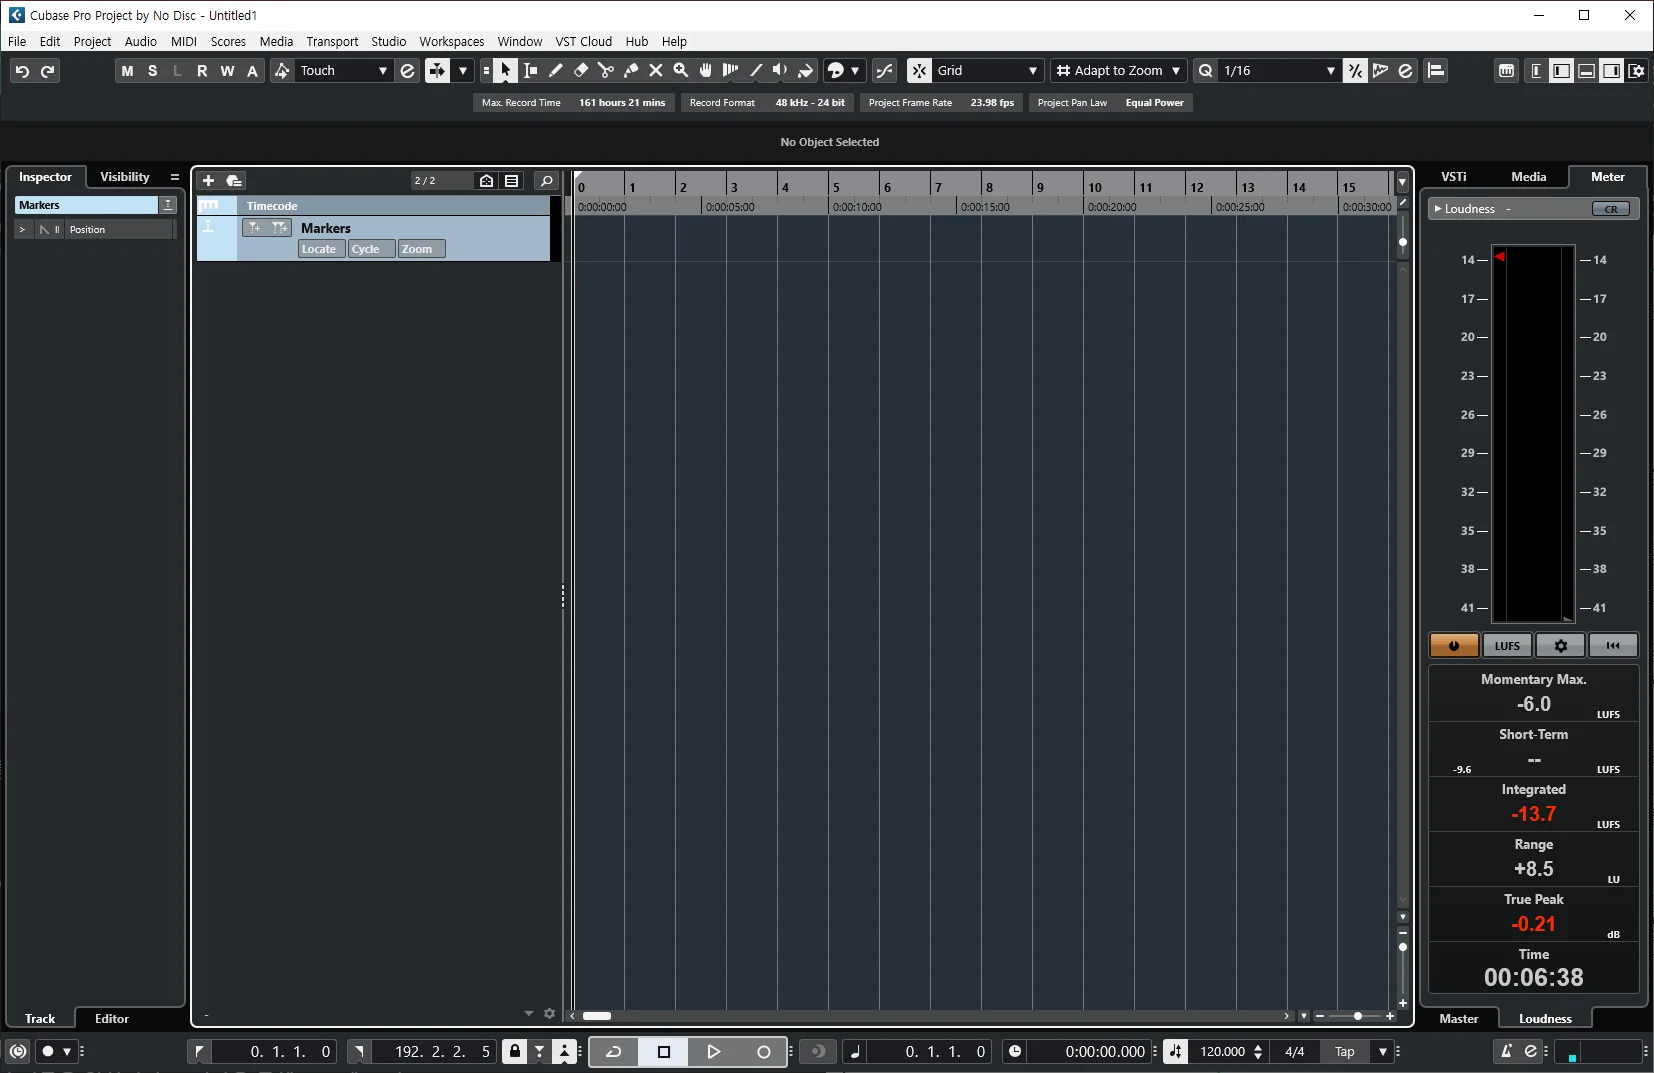
You can now see that the Marker Track has been created.
The Role of the Marker Track
The Marker Track is literally for placing markers at points you want to mark. You can label song form sections such as Intro, Verse, and so on, or mark specific regions. You can also quickly jump to each individual marker you've created using shortcut keys. I'll explain how to use it in detail in a future lesson.
Dividing the Track List
It's convenient to have the Ruler Track and Marker Track we created fixed in place, similar to the ruler Grid at the top. If they aren't fixed, it can cause some inconvenience. As you work, the number of tracks increases and you often need to scroll up and down. When the scroll position is lower, the Ruler Track and Marker Track only appear when you scroll back up, making it harder to keep track of your position. So let's pin these two tracks to the top regardless of the scroll position.
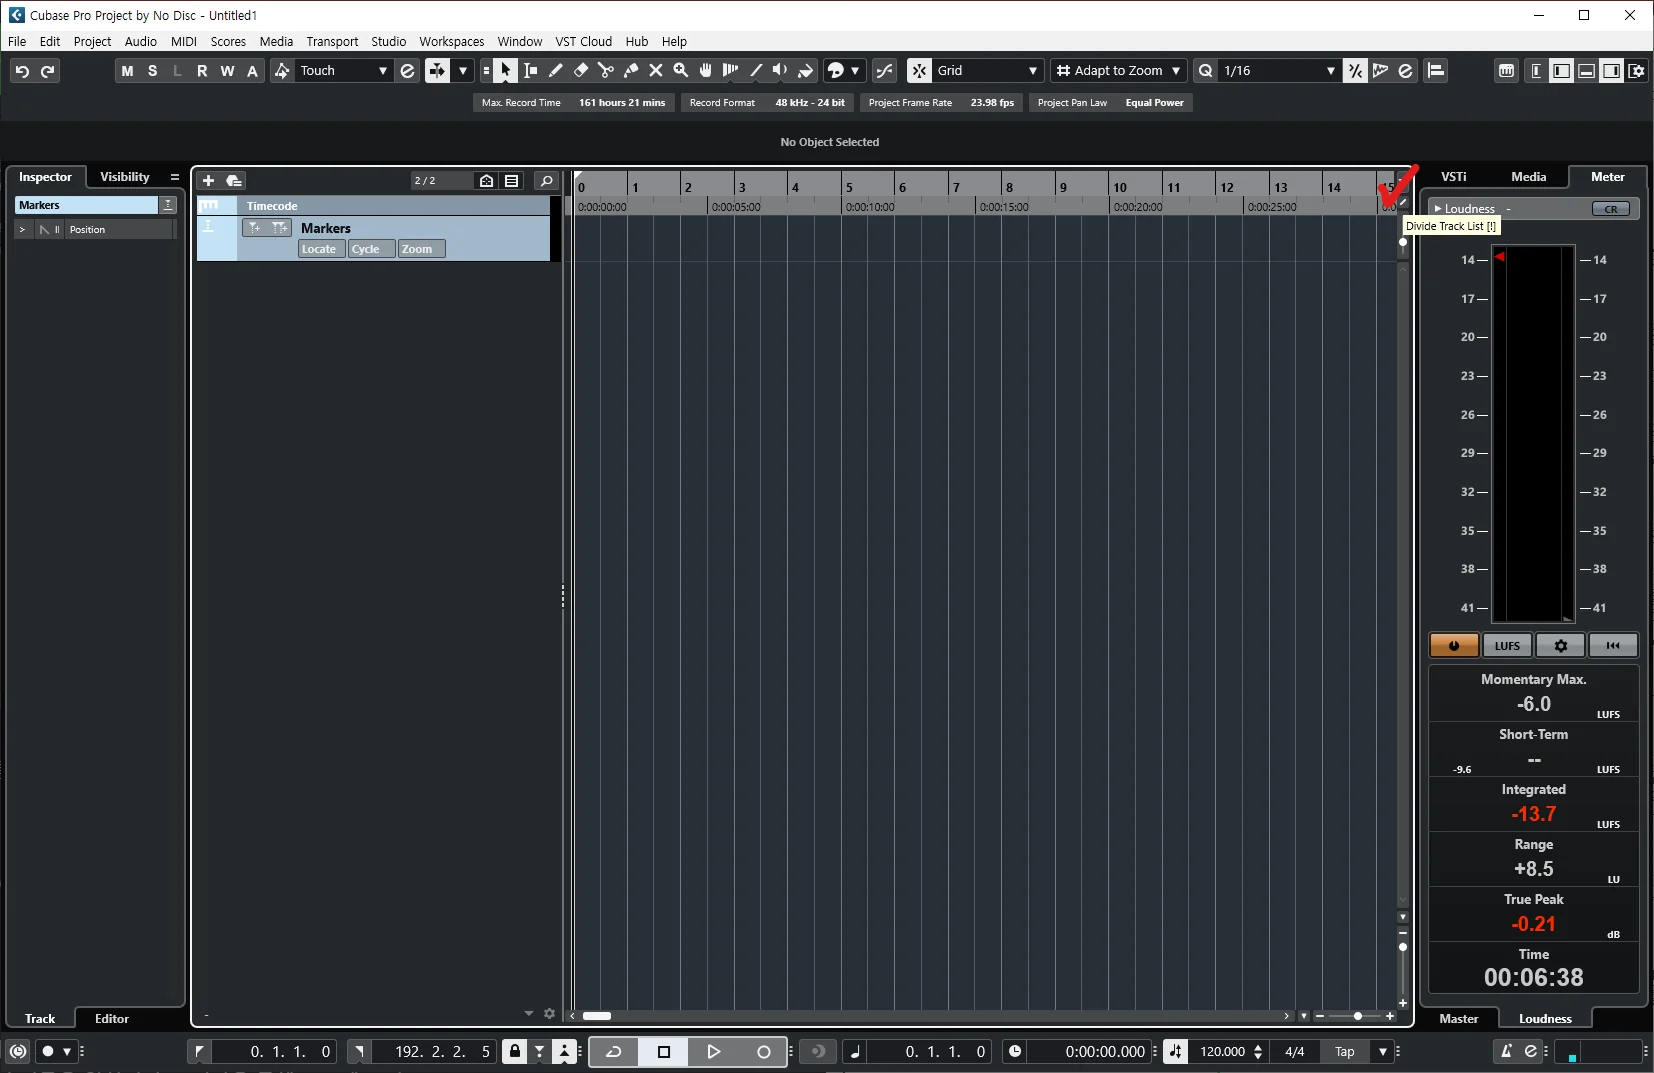
This feature is represented by a very small icon that can be hard to find. In the area highlighted in red, you'll see a diagonal-shaped icon. When you hover your mouse over it, a tooltip reading Divide Track List appears. As the name suggests, it divides the track list into separate sections. Let's click it.
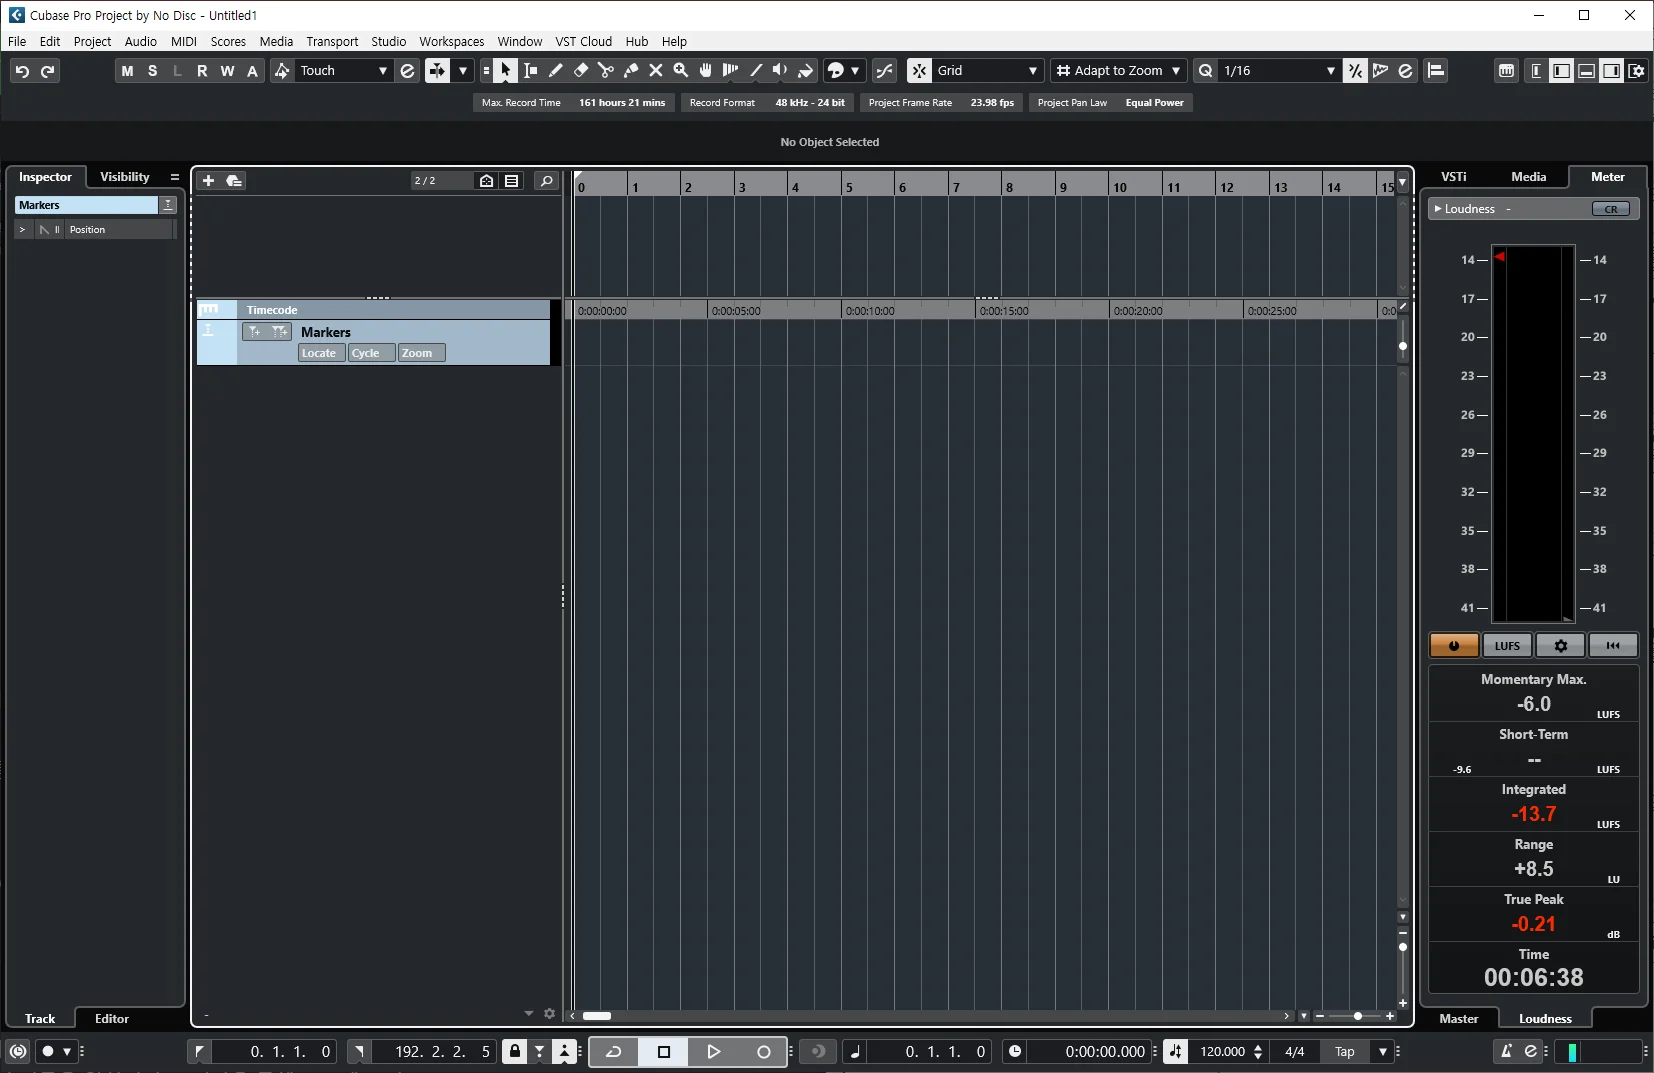
A new section appears at the top, and the two tracks we created are pushed down below. Select both tracks by holding Shift, then drag them up into the new section to move them there.
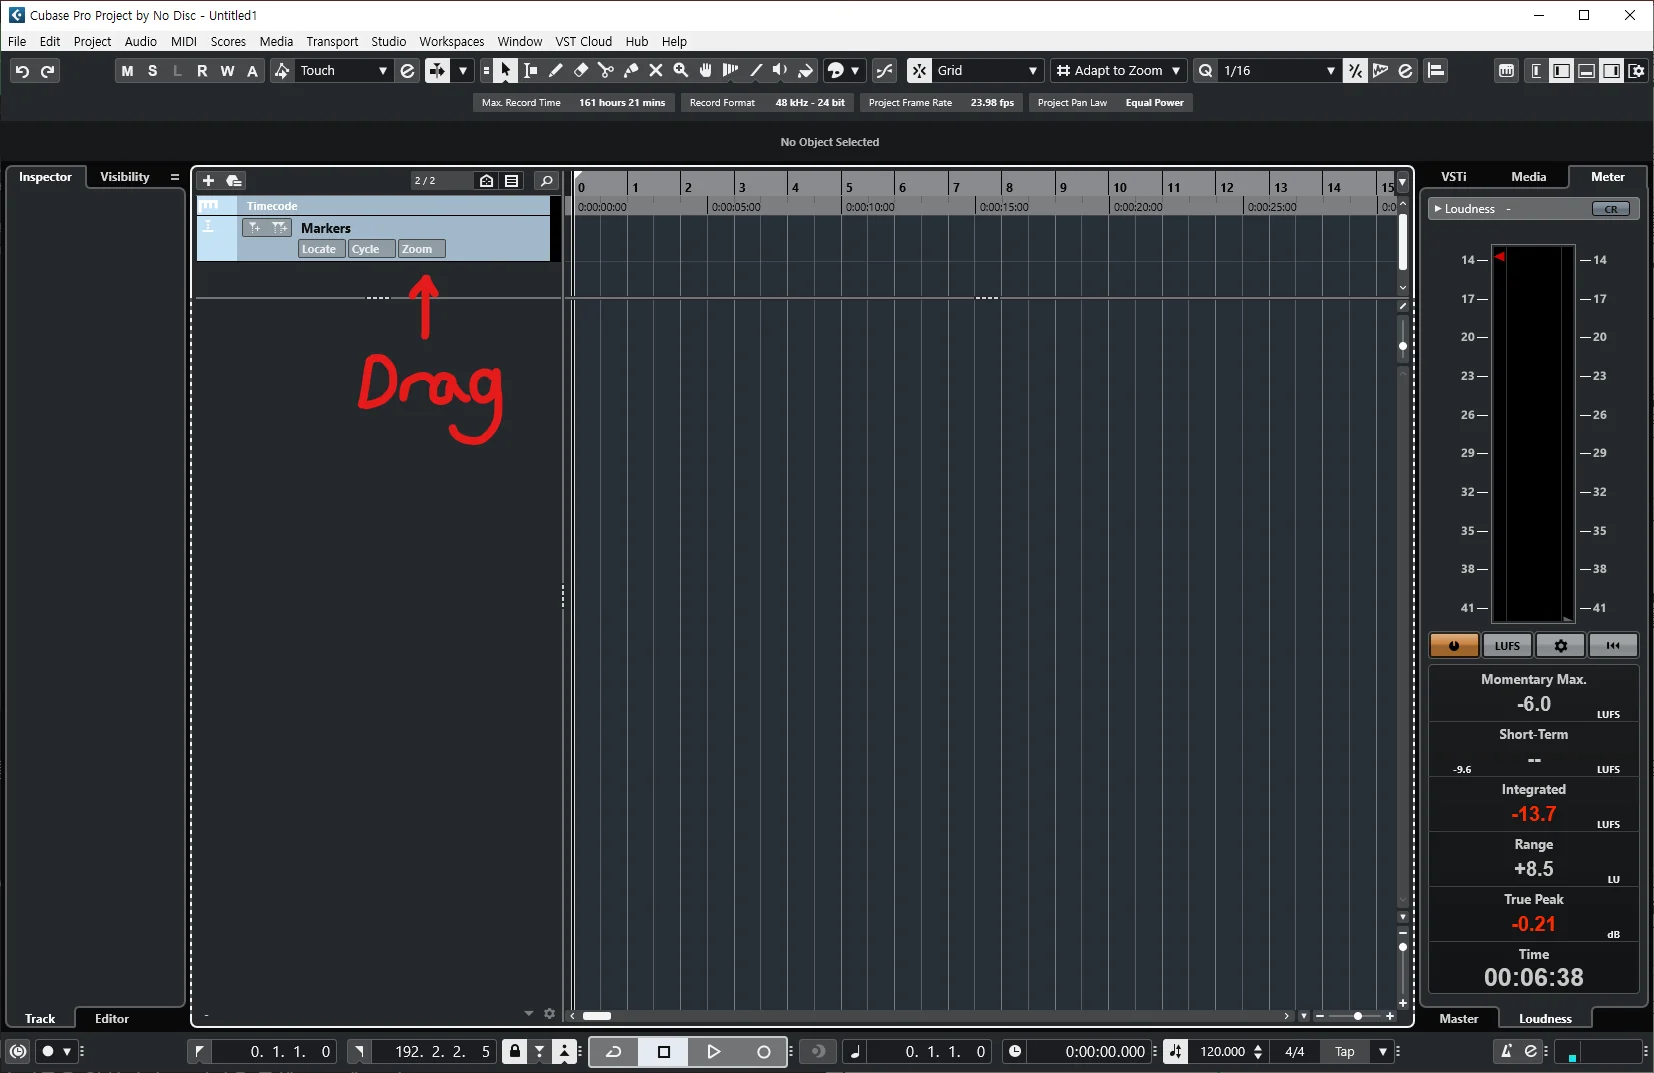
With this setup, the tracks in the upper section will remain fixed at the top even when you scroll down. This isn't limited to just the Ruler Track and Marker Track — you can use the same method for any other tracks you want to keep pinned.
That covers all the most basic settings in terms of visual layout. Now let's save this as a template.
Saving as a Cubase Template
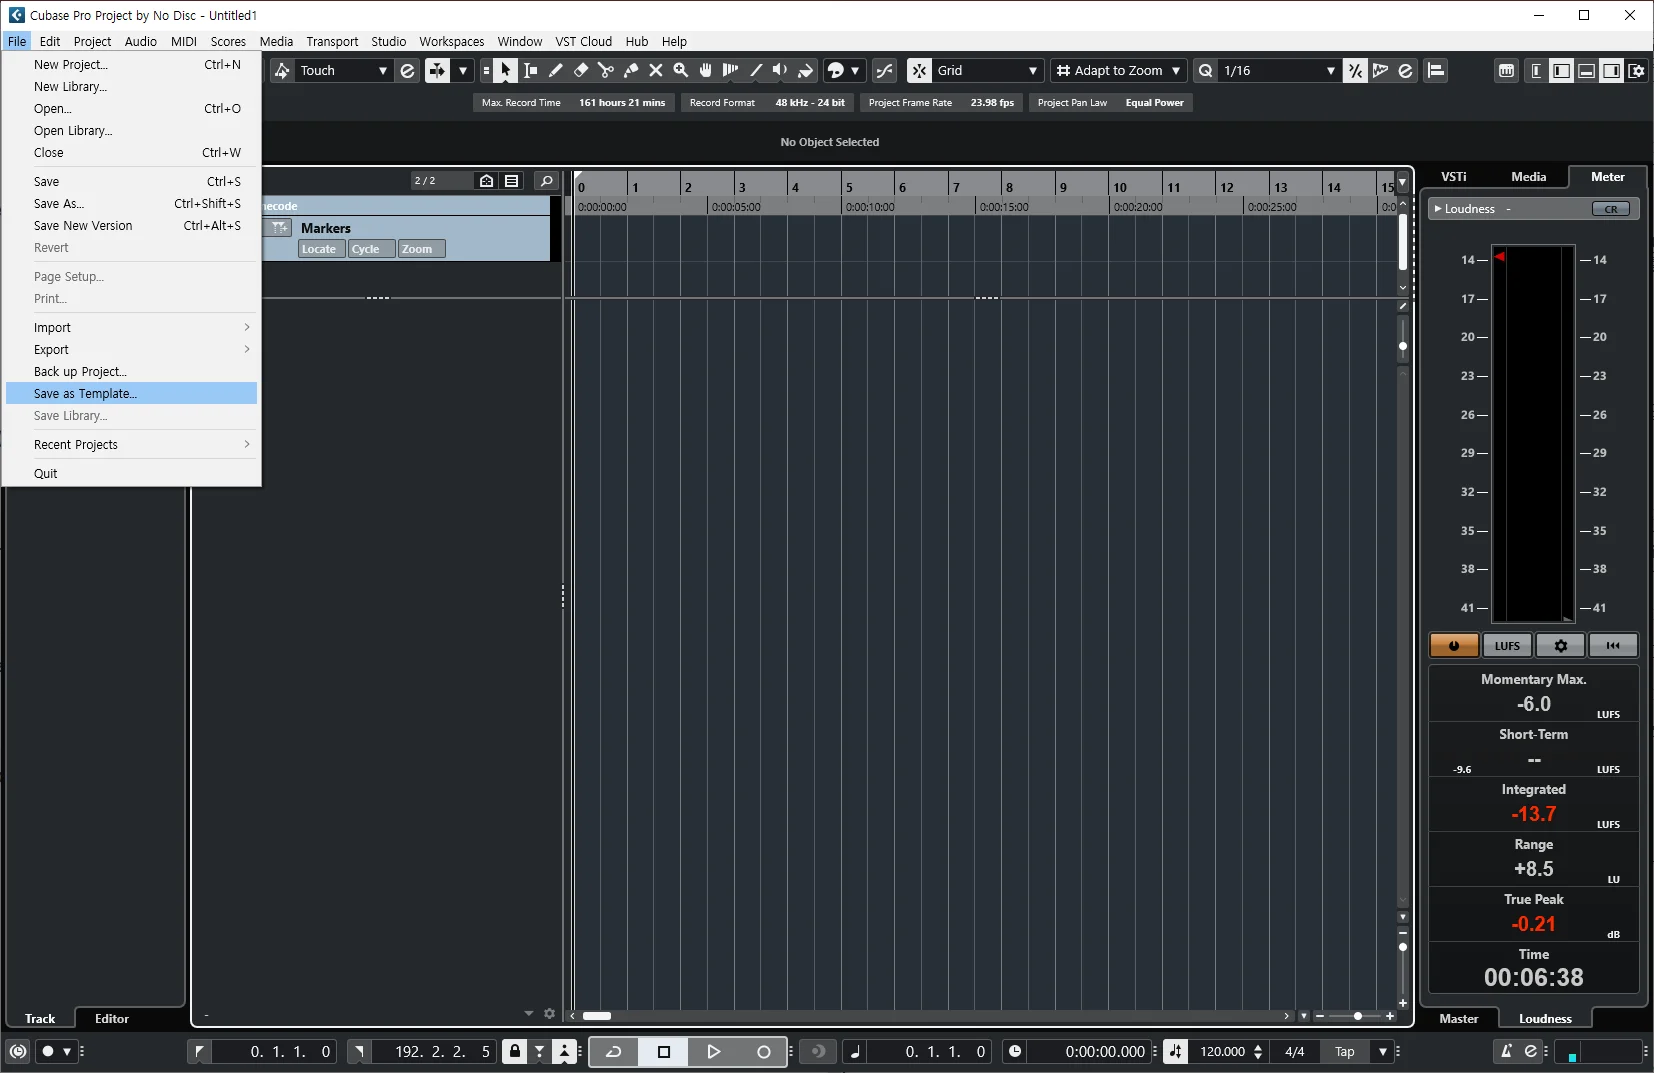
Click File - Save as Template.
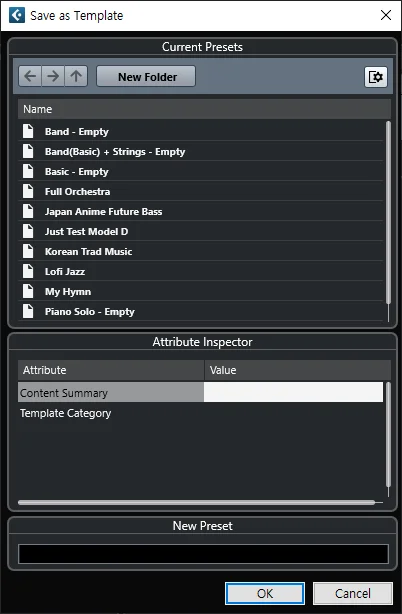
There are three fields to fill in here.
Content Summary: You can write a brief description of the template. It's fine to leave this blank.
Template Category: You can set the template category as it appears in the Cubase Hub. (e.g., Production, Recording, etc.)
New Preset: This is where you enter the template name.
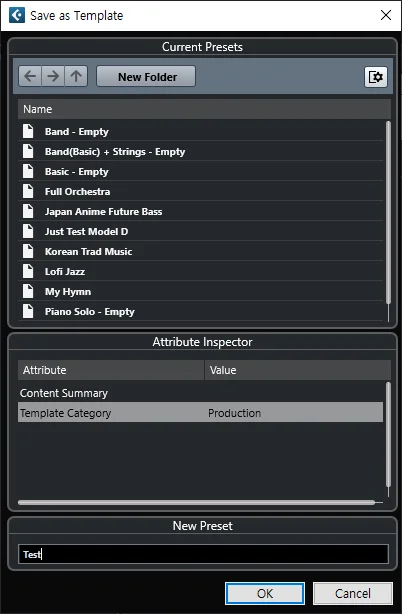
Let's create a template with the category set to 'Production' and the template name set to 'Test', as shown above. Then press Ctrl + W to close the project.
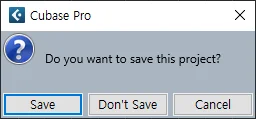
When closing a project or Cubase itself without saving, a dialog will appear asking whether you want to save. As mentioned at the beginning, we're not saving the project separately, so click 'Don't Save' this time.
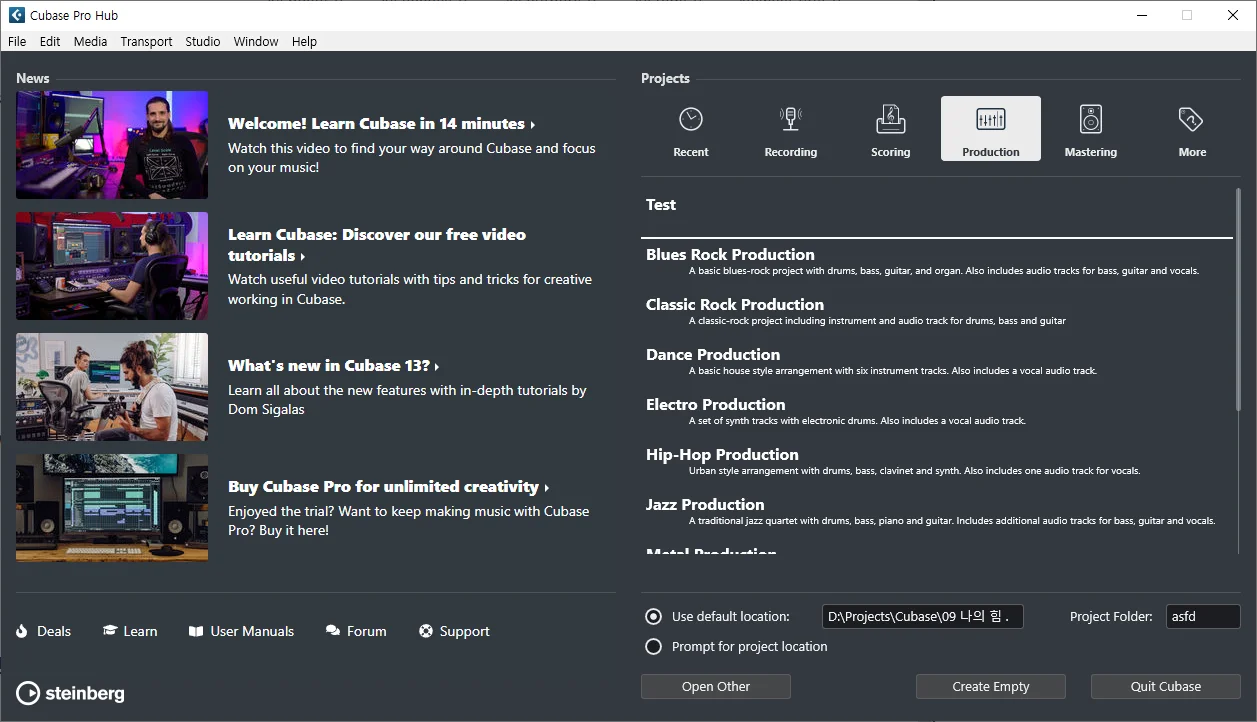
Once the project is closed, the Cubase Hub will appear again. Going to the 'Production' category where I saved it, you can see the 'Test' template listed as shown above. Since nothing was entered in Content Summary, there is no description shown.
From now on, when creating a new project or a new template, try starting from this template. It may seem like a simple process, but as dozens or hundreds of projects accumulate, the time saved will add up to dozens of hours.
In the next post, I'll cover Project Setup and Audio Connection.
Thank you 😀