

3 Hidden Sound Layers Behind a Sword Swing — A Game SFX Breakdown Guide
2026.05.27·Study·20 min readMUZIUM
Also available in:
English···

Why does my homemade sword sound like a "plastic stick"?
Have you ever layered a sword-swing sound effect you made yourself onto a game, only to be baffled when something thin and "tingy" leaked out? Grabbing a sample from a free site and slapping it onto the trigger doesn't yield much different results either. The character is swinging a hefty two-handed sword, but what reaches your ears sounds closer to a toy blade.
Many people get stuck right at this point. If you thought, "Don't I just grab one sword_swing_01.wav from an effects library and hook it up to the trigger?" — that assumption is the starting line of the problem. Looking at the working practices shared through GDC sessions and public articles by sound designers, sword sounds in commercial games are mostly composites assembled by aligning several short audio clips along the time axis. They sound like a single file, but inside them, three or more layers — often nearly ten in complex cases — overlap.
This article breaks down the most fundamental three-layer structure that makes up a sword effect — Swoosh · Impact · Tail — and walks you through it. I've organized it step by step so that, using only an umbrella around the house and free software, you can hold your first "hefty sword sound" prototype in your hands.
Game SFX creation is not magic but the engineering of disassembly and reassembly. Once you learn the structure, the same mindset transfers directly to firearms, footsteps, and UI clicks — not just swords.
💡 Practical tip: Before reading the body, fire up your favorite action game and focus only on the sword-swing sound through headphones. Listen three times in a row, not once, and try to separate (1) the first 100ms, (2) the middle, and (3) the disappearing tail end. The explanations that follow will land much faster in your head.
Why one sound effect splits into three layers
Human hearing breaks sounds down into "time segments"
Even when the ear receives a single chunk of sound, the brain automatically decomposes it into start–sustain–end stages. A tool often used in sound design to describe this time structure is the ADSR envelope (Attack-Decay-Sustain-Release). Attack is the sharply rising segment of 0 to a few dozen milliseconds where the sound begins; decay is the subsequent brief settling segment; sustain is the steadily maintained main body; and release is the disappearing tail.
Sword sounds follow the same structure. The swoosh sounds like a "preparatory motion" before the attack stage, the impact is the apex of the attack, and the tail corresponds to the release. If you try to express all these segments with a single sample, one segment is bound to come out impoverished. This is because the frequency band suited to the swoosh and the band suited to the impact are different. The swoosh generally shines in the high-frequency air-noise region, while the impact gains weight in the lows.
That's why pro sound designers don't try to fill the entire band with one source. They separately record or synthesize sources responsible for each segment, then layer them on the time axis. This is the basic mindset of Layering.
Single layer vs. multi-layer — how the same motion can sound this different
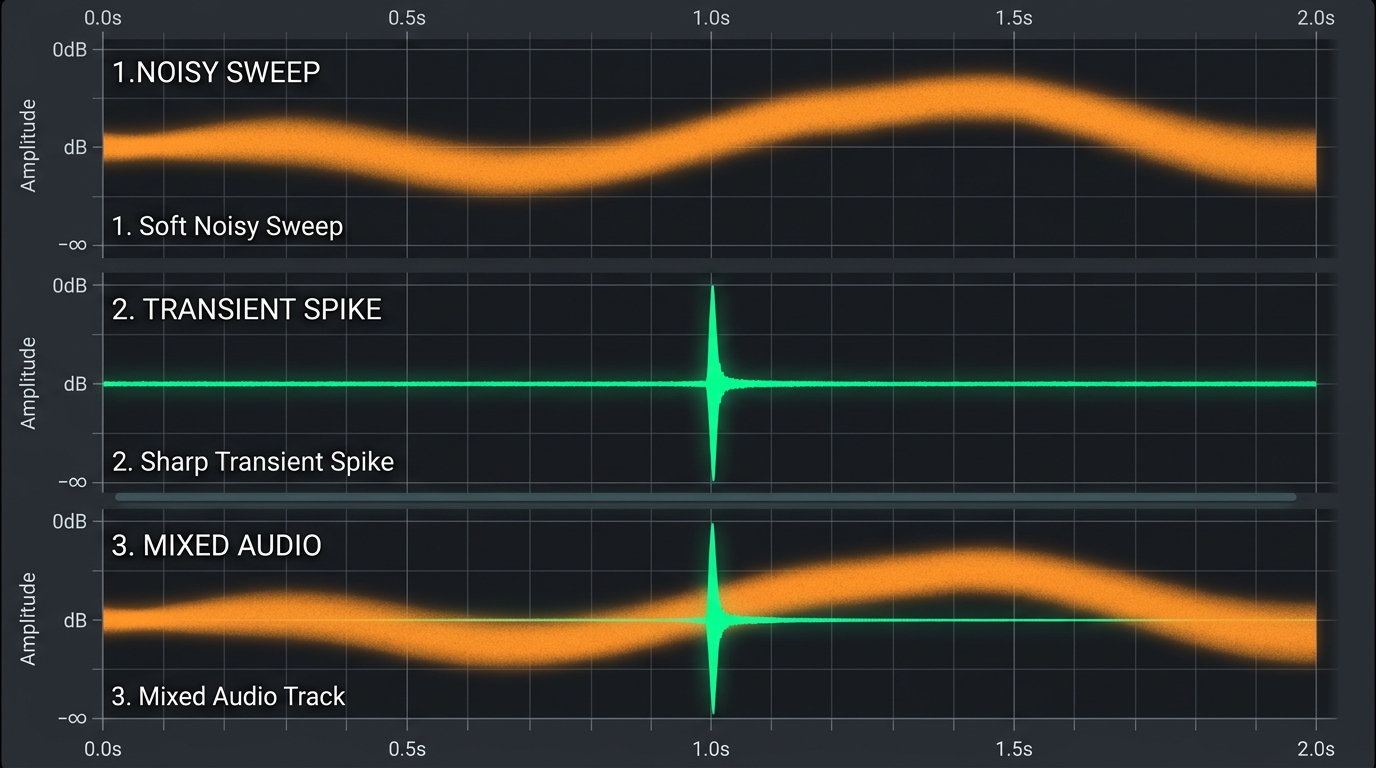
Let me give a simple comparison scenario. Designer A uses a single 1-second sample called "swoosh_sword.wav" as-is. The result is just a "whoosh—" of wind — leaving an empty sensation where you can't tell what the sword cut. It feels close to a character waving a stick in the air.
Designer B, on the other hand, layered the same motion with (1) a recording of an umbrella shaft being swung in the 0–200ms range, (2) a dull impact sound of slicing a watermelon with a knife at the 180ms mark, and (3) a reverberation of a struck metal rod from 200–900ms. With the same animation, the listener hears the narrative that "the sword cuts through flesh and the blade vibrates." They can infer the material and weight of the character's weapon and even the texture of what was cut.
The essence of the difference is information density. A single layer conveys only one event, but multi-layer conveys multiple events simultaneously. Players don't consciously analyze, "Oh, there are three layers." But the subconscious takes in that information and lifts immersion.
Film Foley and game SFX share the same origin but arrive at different destinations
Film foley artists (specialists who create effect sounds via post-recording) also layer multiple sources when creating sword sounds. But film is a linear medium where one scene plays only once. Foley only needs to create "the single most fitting, complete sound for this cut."
Games are different. Players trigger the same sword swing hundreds of times in a single session. When the same file plays repeatedly, auditory fatigue accumulates, and players feel it's "machine-like." That's why game sound design uses techniques to separate layers and randomly modulate pitch and volume per layer at each playback moment. For layers where tonal identity matters — like impacts or metal ringing — a few cents to a semitone of fine variation is common, while layers with freer tone — like the swoosh — typically use a wider range of ±1–3 semitones as a starting point. Add Round Robin (cycling through multiple samples) on top, and the same trigger gains a different grain every time.
Another difference is interactive branching. If the player slashes empty air, the impact and tail layers are muted and only the swoosh plays. If they cut an enemy, all three play. If they cut armor, only the impact is swapped for a metal collision sample. To handle such branching, it's advantageous to have layers separated from the start. A single file mixed down into one chunk is hard to mute or replace its internal components separately. Of course, you could also create separate complete assets for each situation and branch between them. But flexibility and reusability are far higher with the layer-separation approach.
💡 Practical tip: If you use game audio middleware like Wwise or FMOD, register the layers as three separate tracks inside one event from the start. Replacement and expansion become much smoother when weapon types or hit targets are added later.
Layer 1: Making the "Swoosh" that slices through air
The swoosh is essentially "filtered air noise"
The identity of the sound generated when an object slices rapidly through air is the result of turbulent air noise combined with spectral changes from the listener's perspective. Near the blade, there's a high-frequency "swish—," and as it moves away, it slides down to lower frequencies. The most intuitive way to reproduce this in exaggerated form is to generate white noise and automate a band-pass filter.
Here, white noise refers to noise with uniform energy distributed across all frequency bands, and a band-pass filter is a filter that passes only a specific band. Automation refers to the function of varying parameters over time.
The key is that the filter's center frequency must move over time. A frequently cited starting value in practice is a parabolic curve that starts near 1–2kHz, climbs to 4–6kHz within 200ms, then drops back down. It's just a starting point that needs adjusting based on weapon size, speed, and camera distance — not an absolute value. If the center frequency is fixed, the sound feels less like "swinging a sword" and more like "noise coming from a speaker."
Adding subtle pitch bending (the technique of smoothly varying pitch) reinforces the sense of acceleration and deceleration. For a short swoosh, a curve descending from +3 semitones to -2 semitones over 200ms is a good starting point to work with.
Real recording vs. synth — which to choose
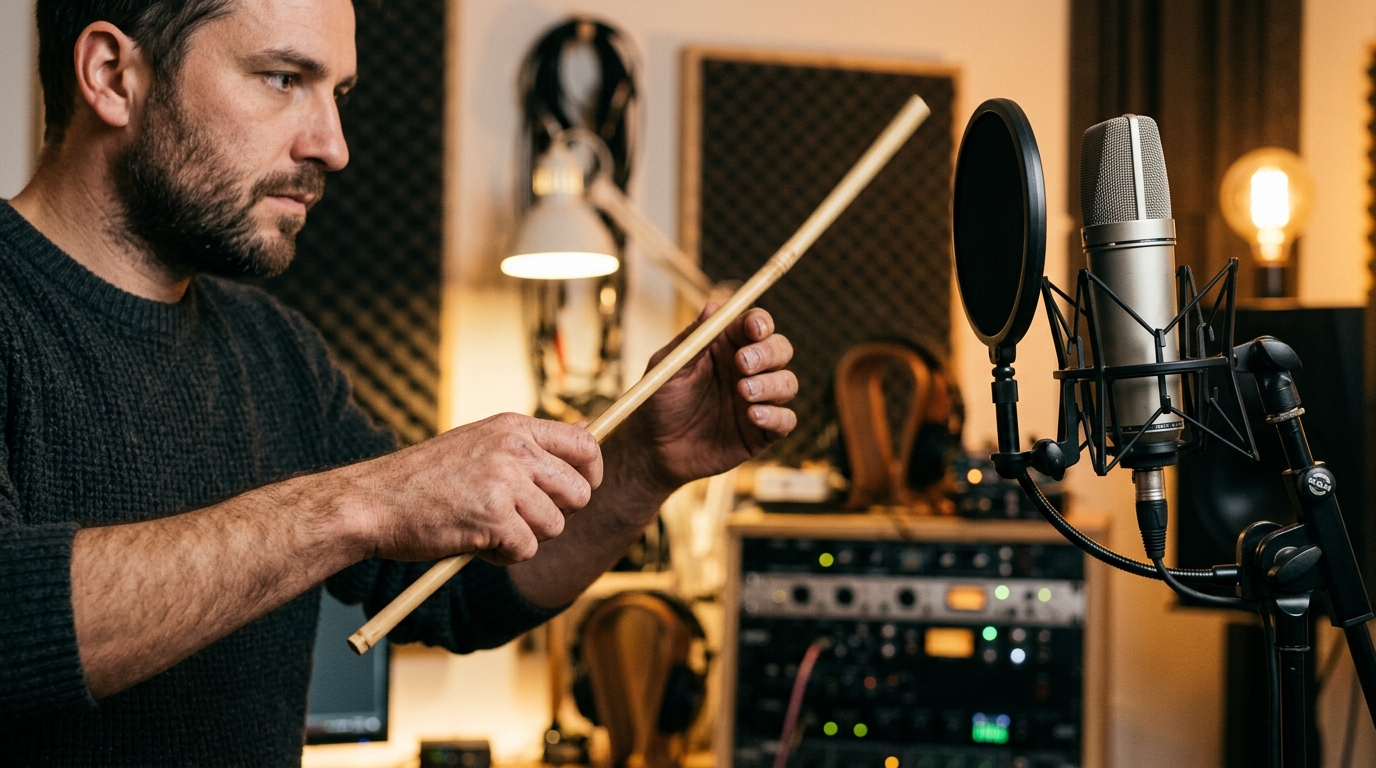
The two approaches produce different textures. Real recording is the method of swinging thin, long objects like umbrella shafts, golf clubs, bamboo sticks, long rulers, or fishing rods in front of a microphone. The advantage is that subtle turbulent noise of air and friction sounds from the wrist are naturally captured in detail. The disadvantage is that the mic setup is tricky. If the mic is too close to the swing path, vibrations directly strike the mic diaphragm, creating "pop" noise; if too far, the swoosh is captured weakly.
💡 Practical tip: Before real recording, always do a physical safety check first. Secure a wide space free of people and pets, move fragile items and monitors out of the way, keep sufficient distance from the mic, and use a wrist strap or gloves. A single moment of carelessness can cost you the price of a microphone.
Synth synthesis is possible in any DAW with just a white noise generator and a filter. The advantage is perfect control. You can adjust noise length, pitch curve, and filter shape down to 0.01-second increments. The disadvantage is it's so clean that it has no "human imperfections." The naturalness of a trembling hand or a slightly off swing is missing.
In practice, mixing the two is the standard. Lay a stable base tone with synth, then add a short real recording on top at 50–70% volume, and you get control and naturalness simultaneously.
Step-by-step workflow: making one swoosh layer
Based on a single swoosh layer, following this order in your DAW will get your first result in hand within 30 minutes.
Step 1 — Generate noise: Use a DAW's built-in synth (e.g., Reaper's ReaSynth, Logic's ES2) or a free plugin (e.g., Vital, Surge XT — free/open-source at time of writing) to generate 300ms of white noise. Use a gate to cleanly trim the front and back.
Step 2 — Automate the band-pass filter: Apply a filter plugin (e.g., FabFilter Pro-Q, or TDR Nova as a free alternative) and automate the center frequency in a parabolic curve of 1.5kHz → 5kHz → 2kHz. Set the Q value (bandwidth — the narrower, the sharper) somewhere between 1.5–2.5 as a starting point, then adjust to fit the weapon's tone.
Step 3 — Automate pitch: Apply a pitch shifter and draw a curve descending from +2 semitones to -3 semitones. A logarithmic curve — fast at the start of the swoosh and slow to drop at the end — feels closer to acceleration and deceleration.
Step 4 — Finish with EQ: Cut lows below 250Hz with a high-pass filter. If the swoosh layer has lows, it'll clash with the impact layer later and become muddy. Boost the 2–5kHz band by +2–3dB to emphasize air quality.
Common mistake: Making the swoosh longer than 500ms is frequent. For game-style fast slash SFX, a starting range of around 150–250ms is reportedly often useful. Longer than that, and it's perceived not as "swinging a sword" but as "wind blowing." However, for two-handed greatswords, charged attacks, or slow-motion staging where the animation is long, extend accordingly. When in doubt, start within 200ms.
💡 Practical tip: When making the swoosh layer, also consider directionality. If the game is stereo, move the noise's pan from -30% → +30% to create a sense of space where the character's blade passes from left to right. This effect works especially powerfully in first-person games.
Layer 2: Designing the "Impact" that determines the sense of strike
The impact is not one sound but "the sum of three bands"
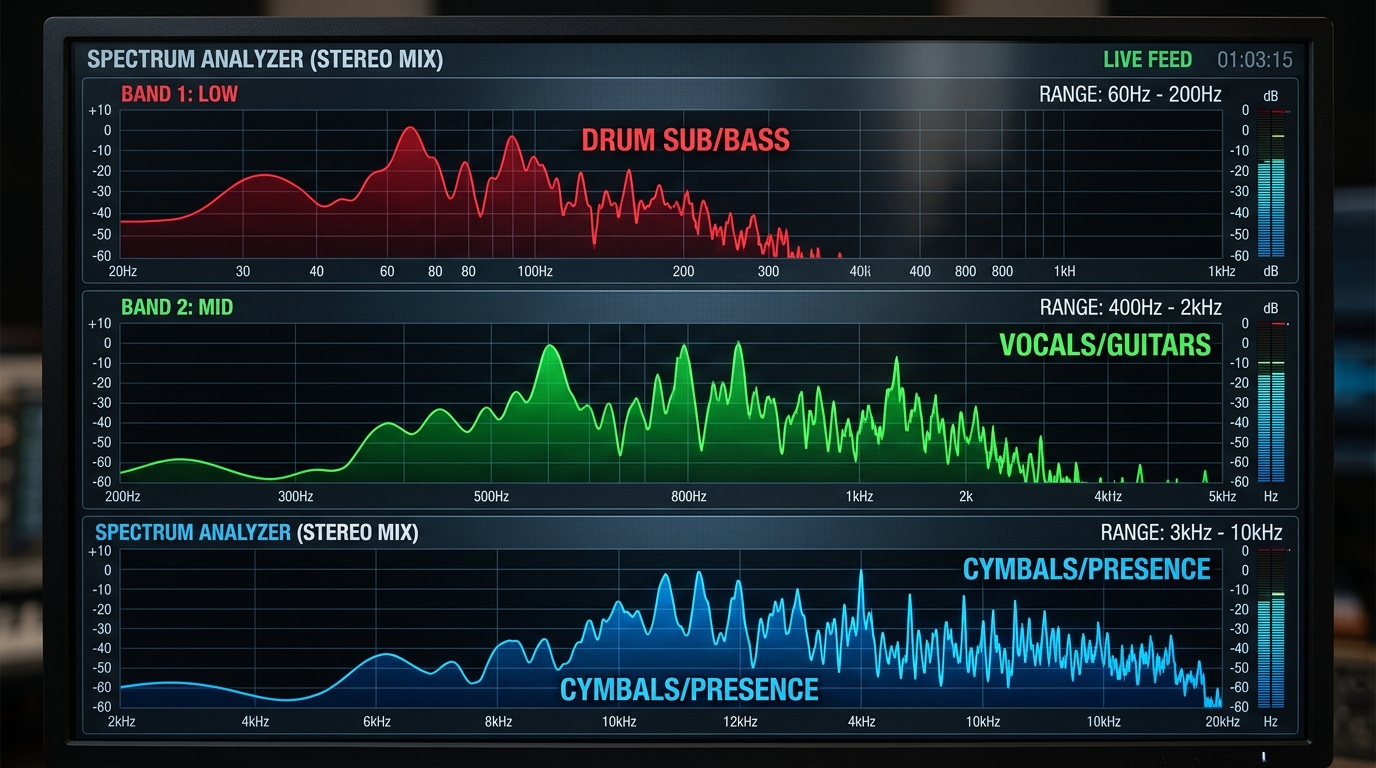
When designers feel the impact is weak, a common trap they fall into is "finding a bigger source." But the problem is not size but frequency distribution. A heavy impact is usually designed as an event where three bands occur simultaneously.
Lows (approx. 60–200Hz) are responsible for weight. The chest-felt vibration and the sense of mass of what's been cut come from here. Common sources include large drums, bass drums, or a 60Hz sine wave tone made with a synth.
Mids (approx. 400Hz–2kHz) are responsible for material texture. Information about whether you're cutting flesh, wood, or metal is condensed in this band. Representative sources include recordings of slicing watermelons, cabbage, or raw meat on a cutting board.
Highs (approx. 3kHz and above) are responsible for sharpness and clarity. The "click" or "clang" signal of a blade slicing something comes from here. Short hits on metal rods or short white-noise bursts from a synth are commonly used.
The numbers above are not "correct" bands but starting points for your work. They need to be adjusted via spectrum analysis based on weapon, material, and mix style. If you prepare the three bands separately and use EQ to leave only each one's territory while cutting the rest, they stack clearly without clashing. If one source has the entire band, the phases clash among themselves and the sound actually weakens.
Impact sources by material — what to mix and how
Let me give an example of a two-handed sword cutting an enemy wearing leather armor.
Lows: A recording of a large drum struck briefly with the palm, or a tone of a 60Hz sine wave generated at 20ms length. Cut above 200Hz with EQ.
Mids: A recording of dragging a knife across a thick leather jacket, or the classic foley source of slicing a watermelon with a kitchen knife. Leave only 200–2kHz with EQ.
Highs: A recording of a short metal rod striking another piece of metal. Leave only above 3kHz with EQ and trim the duration short to 50ms.
For "the sound of cutting iron armor," swap the mid-band source from leather to metal collision (a struck iron pipe). For "the sound of cutting wood," place a recording of splitting firewood in the mids. Keeping the formula's framework while swapping only the mid-band source can make a big material difference. However, if you want more convincing results, you'll also need to adjust the shape of the high-band transient and the reverb of the tail together. This point shows both the economy and the limits of layering simultaneously.
Transient shaping and compression — sculpting the attack
Gathering sources isn't the end. The "flavor" of the impact is determined within the first 10ms. This segment is called the transient (the sharpest peak segment at the very start of the sound), and you sculpt it with a Transient Shaper plugin.
Attack emphasis: Use tools like SPL Transient Designer (paid) or the free Transient Shaper included in the Kilohearts Essentials bundle to push the attack up by +3–6dB. The feeling of receiving a short, strong impact intensifies.
Sustain attenuation: Lower the sustain knob on the same tool by -3–5dB. This reduces the lingering reverb after the impact, clearing space for the next tail layer to enter cleanly.
Compression: A common starting setting is to apply a compressor with fast attack (1–5ms), fast release (50–100ms) at a 4:1 ratio. This raises the impact's average loudness, so weight is maintained even at low volume.
Impact by game genre — how heavy do we go
Even the same sword impact has different tones depending on genre. Soulslike (frequently cited reference titles: Dark Souls series, Elden Ring) emphasizes lows and softens the attack, creating a heavy "thud—" impact. It gives the sensation of the same action vibrating for 0.3 seconds.
Stylish action (frequently cited reference titles: Devil May Cry 5, Bayonetta), conversely, reduces lows and strongly lifts the highs and attack. A single slash ends with "shaa!" so it doesn't overlap with the next motion. In games where combos extend to 8 hits, if each strike lingers for 0.3 seconds, the sound becomes muddy like mud.
Cartoon style (frequently cited reference title: Cuphead) cuts the lows almost entirely and adds cartoonish mid-band effects (e.g., synth tones like "pow!" "pop!"). Since expressiveness takes priority over realism, the proportion of real recordings is lowered and synthetic/cartoonish sources are actively used. (The titles above are not citations asserting their internal sound design but listening references to gauge tone direction.)
💡 Practical tip: When making impact layers, keep a reference track open in your DAW alongside. Load up effect sounds from games of similar genre to what you're making at the same volume, and compare-listen to your work every 5 seconds — the tone direction won't drift.
Layer 3: Completing the "Tail" that adds reverb and weight
The tail is the "address of the sound" — where did the event happen?
Even with just the swoosh and impact, the sword sound seems complete at first. But something feels missing. It sounds like an event that happened in a vacuum. Human ears obtain location information through the reverb of events happening in a space. The tail layer plays exactly this role of applying spatial information.
Reverb is the most intuitive tool. For a cave, apply a large room reverb with decay time (the time it takes for the reverb to fade) of 2–4 seconds; for a plain, a short reverb of 0.5–1 seconds; for an indoor corridor, a medium reverb of 1–2 seconds. Even with the same impact, just changing the reverb makes the same character sound like they're fighting in a different space.
Convolution reverb is a tool that goes one step deeper. It's a method where you load impulse responses (IR) measured in real spaces (cathedrals, caves, concert halls) and apply that space's acoustic characteristics as-is. Using materials like the free IR collection published by Voxengo lets you obtain realistic spatial feel that's hard to create with algorithmic reverbs.
The important point here is to apply tail reverb only to the impact layer. If you also apply reverb to the swoosh layer, reverb starts from the moment the blade slices air, which feels unnatural.
Metal ringing and harmonic sound — the reverb of a trembling blade
Another axis of the tail is the vibration of the sword itself. A metal blade vibrates at its natural frequency when struck. This is called Metal Ringing, and it's a key detail of realistic sword sound.
The simplest method is to add a sine wave. If you fade out a sine wave tone in the 800Hz–2kHz band for 100–500ms right after the impact, it gives the impression of a vibrating blade. Detuning two sine waves (e.g., 1.2kHz and 1.8kHz) slightly off pitch and overlapping creates a more natural inharmonic vibration.
For real recording, the standard is to strike a metal rod (rebar, bicycle spoke, small cymbal) and capture the long sustain. After recording, lower the pitch by -5 to -12 semitones to make it like a heavy blade, cut the attack portion, and use only the reverb.
There's also the method of using a metal IR with convolution. Some libraries provide metal vibration impulse responses, so applying them to general signals automatically coats them with metal reverb.
Aligning three layers on the time axis — a step-by-step guide
Once the three layers are ready, the final step is to align them precisely on the timeline.
Step 1 — Use the impact as the reference point: Set the impact's transient peak to 0ms. This is the moment the listener feels "cut," so it becomes the criterion for all alignment.
Step 2 — Place the swoosh in front of the impact: Position the end of the swoosh layer (the loudest part) 20–50ms before the impact peak. Too close, and the two layers clash and sound like one chunk; too far, and the swoosh and slash become separate events.
Step 3 — Place the tail behind the impact: Set the tail layer's starting point 10–30ms after the impact peak. If you place it at exactly the same position, the impact's attack is buried in the tail and becomes blurry. Delaying it slightly makes the impact heard distinctly first, with reverb following afterward. Set the tail's total length within a starting range of 200–1500ms.
Step 4 — Volume balance: For starting volumes of the three layers, generally set swoosh -6dB, impact -3dB (loudest), tail -9dB as starting points. The volume should reflect that the impact is loudest, and the swoosh and tail play supporting roles to the impact. Fine-tune by ±2dB depending on listening environment (headphones/speakers/mobile).
Step 5 — Master EQ and loudness adjustment: Apply light master EQ to the final sound combined from the three layers to clean up phase clashes. If there's a muddy chunk-like band around 200–400Hz, attenuate by -2–3dB. The loudness target for the final game mix varies by platform. Console/PC games commonly cite a starting reference of -23 to -24 LUFS integrated, and mobile/handheld devices around -16 to -18 LUFS. Working levels for individual effect sound files can be freer than this, but final mastering must be decided according to the project's mix bus structure and platform SDK guidelines.
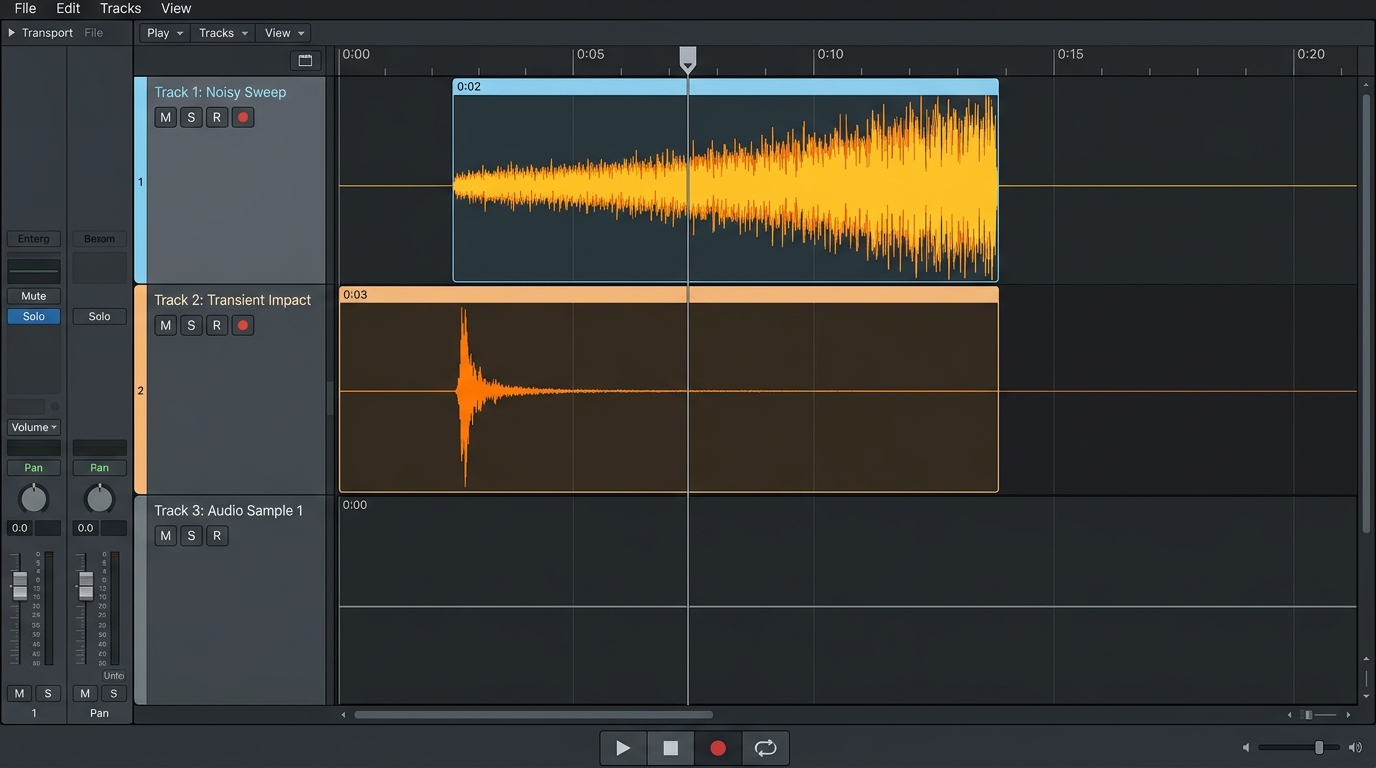
Common mistake: The most frequent problem is having all layer starting points precisely aligned at 0ms. When the attacks of three sounds burst simultaneously, phase clash occurs, and as a result the impact sounds blurry. Intentionally putting a time difference of ±10–50ms almost always sounds better.
Another mistake is tails being so long that they overlap with the next motion. In combo attacks, if each strike's tail is over 1 second, the second strike's impact gets buried in the first tail. After measuring the in-game combo speed, it's safe to limit the tail length to 60–70% of the combo interval.
💡 Practical tip: Once alignment is done, convert the final sound to mono and listen. If the impact is heard clearly even in mono — where stereo tricks have vanished — the alignment is good. Mobile games are largely played on smartphone speakers (mono), so this check is especially important.
💡 Practical tip: Listen again 24 hours after you finish. Right after working, your ears become accustomed to your own result and lose objectivity. Take a day off, listen again, and the excessive parts and lacking parts are immediately heard. This is called ear refresh, and it's a basic habit of sound designers.
Three-line summary and a first experiment you can do today
One sword sound effect is the result of three short sound layers — swoosh, impact, and tail — overlapped on the time axis. Because each layer is responsible for a different frequency band (swoosh: high-frequency air noise, impact: sum of low/mid/high across all bands, tail: spatial reverb and metal ringing) and time segment, an information density that can't be made with a single sample is created. Final polish ultimately comes down to fine adjustments like timeline alignment (±20–50ms offset relative to the impact) and volume balance (-6/-3/-9dB starting points).
Let me suggest one experiment you can try right now. Secure a safe space, grab an umbrella or long stick from home, and capture 5 swoosh sounds with a smartphone recording app. Then open the free DAW Audacity, or install Reaper, which offers a 60-day free evaluation (the Reaper evaluation provides full functionality; if you want to continue using it after 60 days, you must purchase a discounted license of about $60 if you qualify). With one impact sample downloaded from the internet, overlap them as two tracks, and if possible add a short metal reverb sample as a third track. Place the swoosh in front and the tail behind, with the impact as the reference, and just by overlapping two tracks you'll have your first multi-layer sword sound prototype in hand.
Sound design skill doesn't grow from grandiose equipment but from ear training and the accumulation of small experiments. Today's 5-minute recording becomes a better swoosh a week later, and a month later it piles up into your own library. It's okay if what you make sounds awkward at first. That awkwardness is the most honest feedback telling you the direction of your next work.