

Cubase Pro 13 Tutorial 1-4: Configuring Your Workspace
2024.04.13·Steinberg Cubase·6 min readMUZIUM
Also available in:
English···

Go to Previous Lesson
In the previous lesson, we looked at how to create your own template. Creating a template in advance before using Cubase is essentially a necessary step for convenience and workflow speed.
The settings covered in this lesson must be configured to match your working environment.
Cubase Studio Setup
Audio Interface
First and foremost, you need to specify the audio interface you will use in Studio Setup.
This is because the audio interface is the device that controls all AD (Analog to Digital) and DA (Digital to Analog) converters. It is the most important device, with all Audio Inputs, Outputs, and even MIDI interfaces built in.
If you do not have an audio interface, your desktop or laptop's built-in sound card will be used instead. However, the performance of most sound cards is not great, and they tend to have long latency.
When latency is long, there will be a corresponding delay during recording and playback of performances or vocals. This makes it virtually impossible to record in precise time.
https://ko.wikipedia.org/wiki/ASIO
When you install Cubase, the ASIO driver is installed by default. The audio interface you use on Windows must support ASIO. Even if it does not, you can achieve compatibility through a program called ASIO4ALL, but there are issues with stability and the inability to play other Windows audio simultaneously. Therefore, we recommend finding and purchasing a model that supports ASIO if at all possible.
Even without purchasing a separate audio interface, if you have a sound card, you can use it similarly to ASIO. This significantly reduces latency, but it still cannot replace the role of professional hardware.
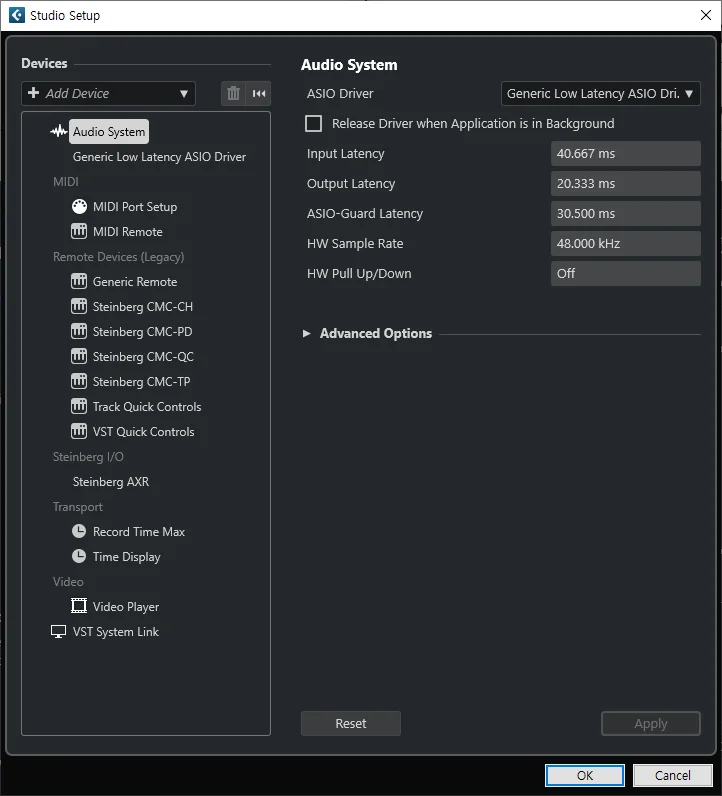
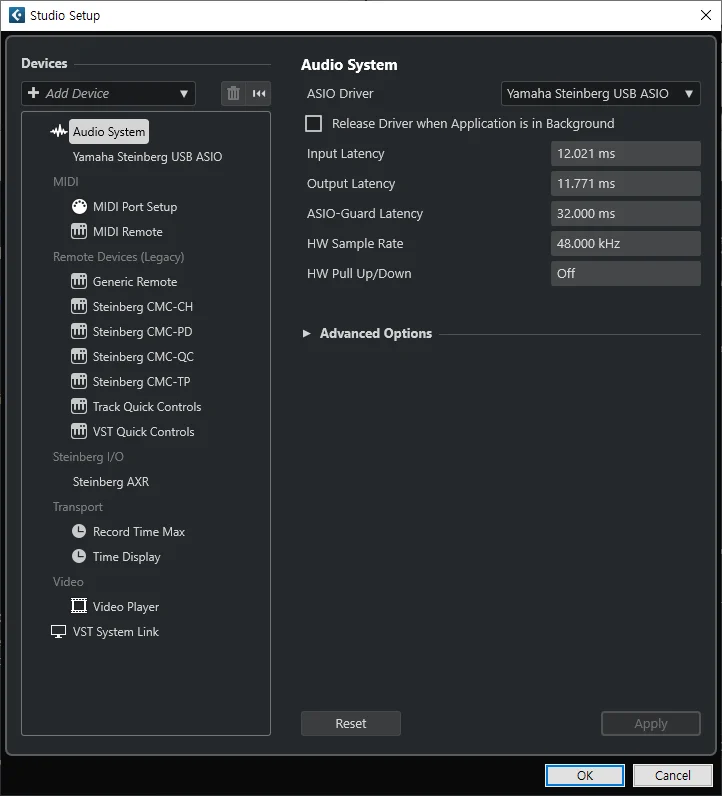
Latency comparison between an audio interface (Steinberg AXR4) and an ASIO Driver (may vary depending on environment, buffer size, etc.)
Comparing Input Latency and Output Latency, you can see a difference of 2 to 4 times. In fact, the Generic ASIO Driver comparison is based on the minimum buffer size, so you can get a sense of just how significant the audio interface's role is.
Input Latency indicates how much delay occurs during recording, while Output Latency indicates how much delay occurs during playback.
Now let's specify the audio interface within Cubase.
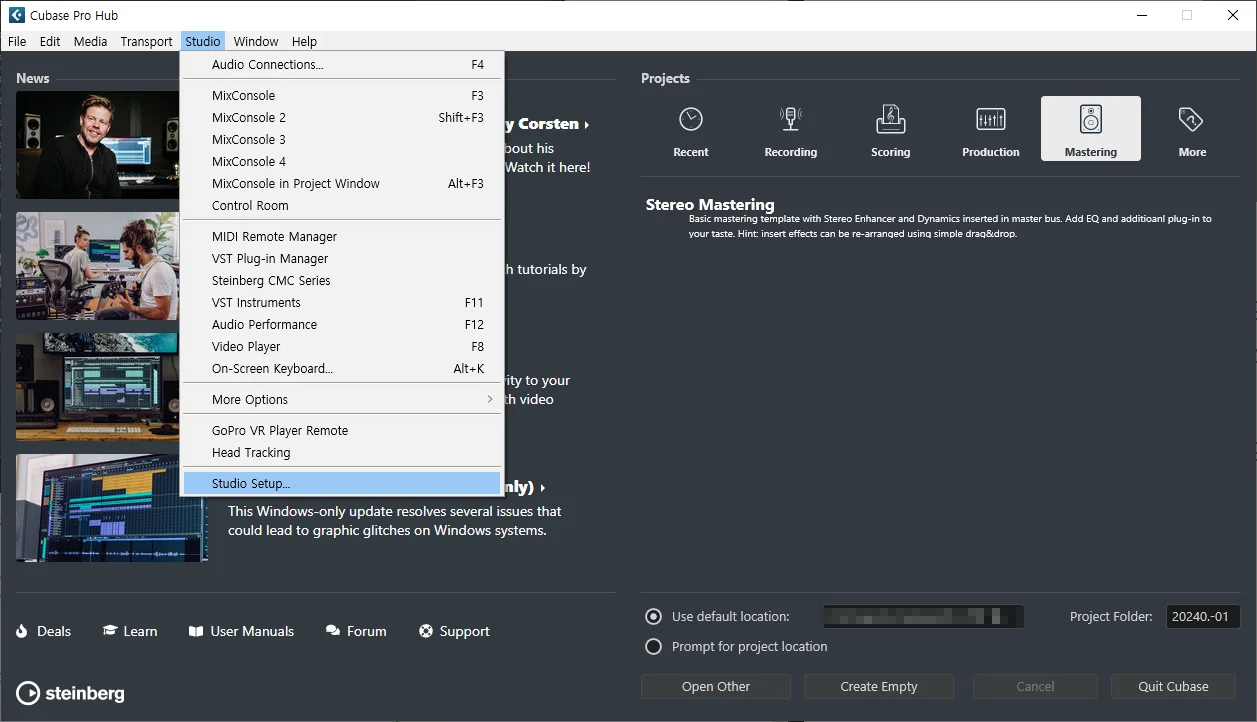
From the Cubase Hub, click Studio - Studio Setup.
(In Cubase 12 and earlier versions, you must create a project first for the top menu to appear.)
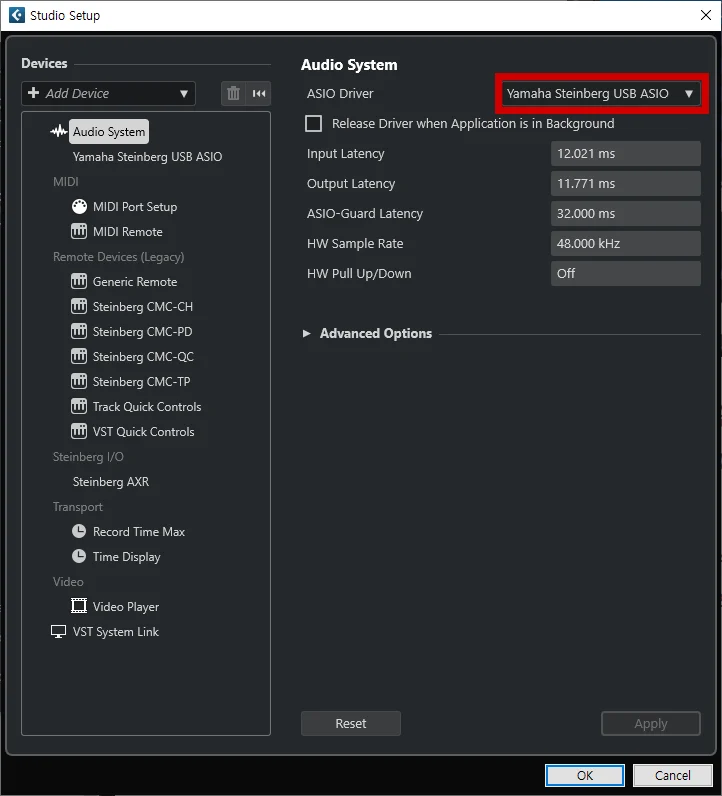
Click the highlighted area in red to select the driver you want to use, then click OK at the bottom.
Audio Connection
Now that you have specified the audio interface, you need to check and configure the Input and Output settings. Press F4 to open Audio Connection.
Inputs
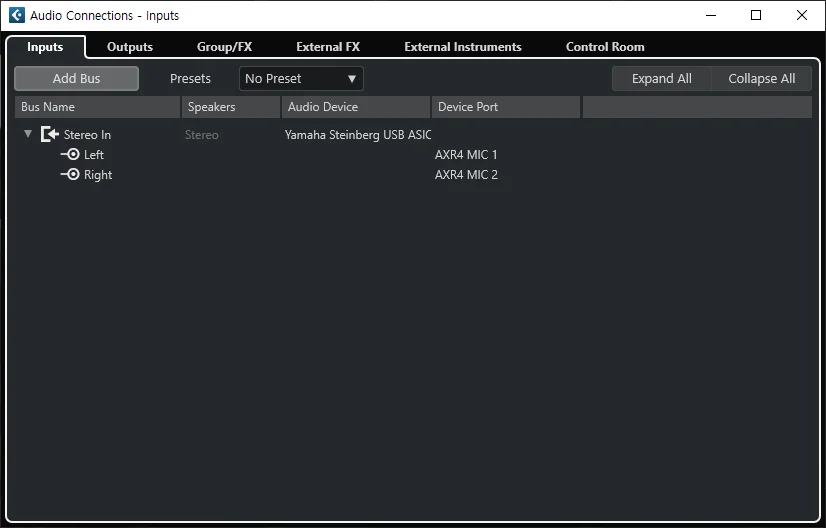
This is the Input screen. Looking at Audio Device below, you can see that the audio interface you specified in Studio Setup has been automatically assigned. If it shows Not Connected, click on that field and assign your audio interface.
Currently, only Stereo In exists in the Input section, but you can add more channels to match the number of inputs supported by your audio interface. Click Add Bus and create either a Stereo or Mono bus. Then, assign the appropriate Input channel under Device Port.
Outputs
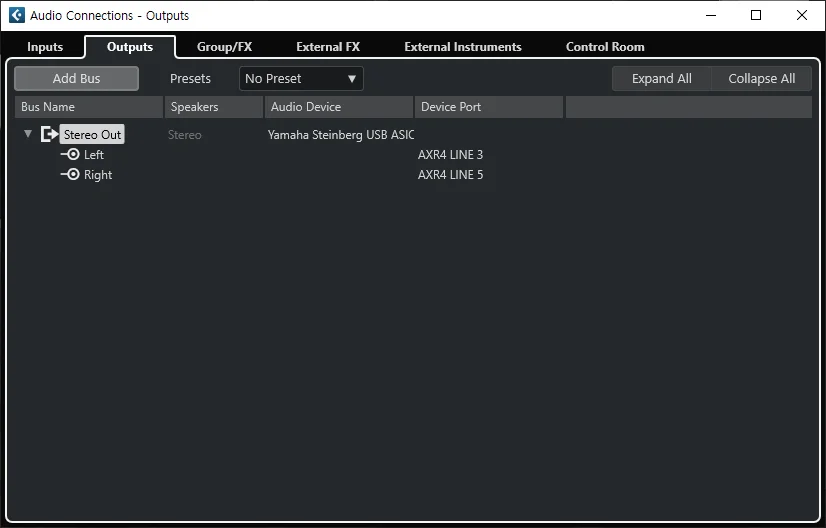
Next is the Output screen. Similarly, assign the Audio Device and set the Device Port to match the channel your speakers are connected to. At this point, make sure to correctly identify the Left and Right speakers when assigning channels. It is generally more convenient to assign the lower number to the left. (Example: Left = 1, Right = 2)
Control Room
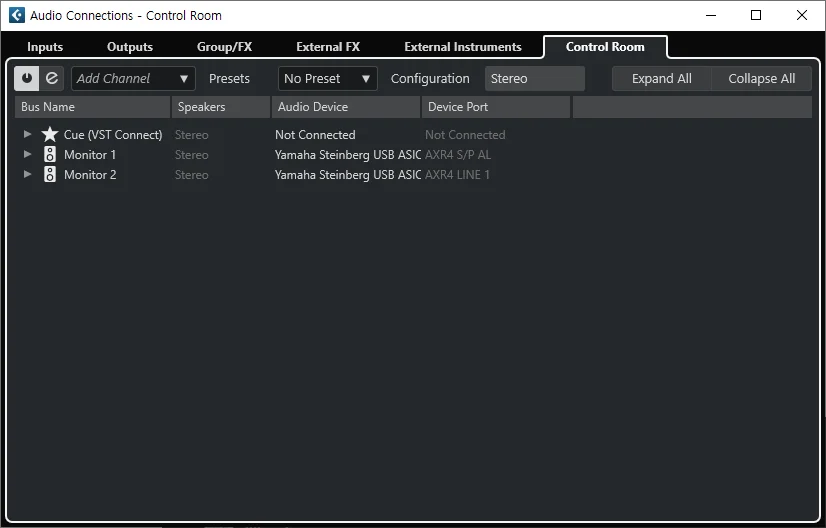
Next is the Control Room screen. Control Room can be used or left unused.
The default setup is to connect your speakers via the Outputs tab, but the alternative is to assign the output channel to the Control Room instead.
The greatest advantage of using Control Room is that you can adjust the monitoring volume independently from the actual output volume. If you assign a speaker channel in Outputs and adjust the final output volume within Cubase, that volume adjustment will also affect the exported audio file. However, if you adjust the monitoring volume in Control Room, it will not affect the volume of the exported audio file.
To use it, click the power icon in the upper left to activate it, then assign the Audio Device and Device Port accordingly. At this point, if the same Device Port is already assigned in Outputs, those settings will be reset.
Project Setup
Finally, there is Project Setup. The most important settings here are Sample Rate and Bit Depth. (This post will only briefly cover these two topics.)
First, open or create any project. Then press Shift + S to open the Project Setup window.
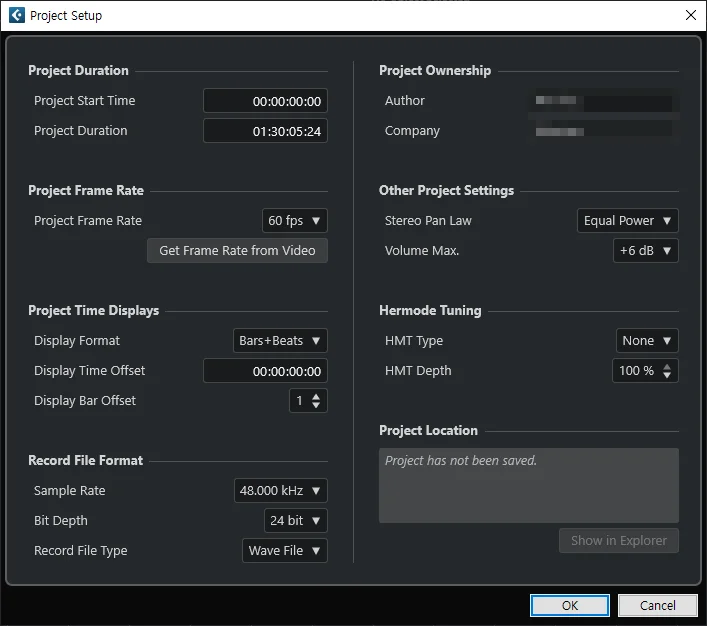
Here, we will first configure the Record File Format in the lower left.
Sample Rate
Simply put, Sample Rate is a concept similar to "resolution." Programs like Cubase and Pro Tools are referred to as D.A.W. (Digital Audio Workstation). The sample rate is related to the "Digital" aspect of this term. A lower sample rate means lower resolution, and a higher one means higher resolution. However, working at an excessively high sample rate will put a greater strain on your computer. Based on the "Nyquist Theorem," the most efficient sample rates are considered to be 44,100 Hz (44 kHz) or 48,000 Hz (48 kHz). These are not necessarily the best, but they are the most commonly used sample rates.
48,000 Hz means that one second is divided into 48,000 segments. Each of those segments is called a sample. The higher this value, the more finely divided the digital audio is, allowing it to more closely approximate an analog signal for both input and output.
During the era when CDs were widely used, 44 kHz was common, but today 48 kHz is the standard. If the sample rate differs each time you exchange audio files, the conversion process will inevitably cause some alteration to the audio. Therefore, let's set it to the widely used 48 kHz.
Bit Depth
Bit Depth is the setting that determines how much information is stored in each sample as described above. In the audio domain, this "information" refers to "volume." 16-bit divides into 2¹⁶ steps, while 24-bit divides into 2²⁴ steps. Again, the CD standard used 16-bit, but for general-purpose use, it is better to set it to 24-bit.
Configuring Each Cubase Template
This Project Setup applies specifically to the given project. Be sure to check it every time you create a new project. If you configure the Project Setup before saving a template, you can reduce the risk of accidentally working with incorrect settings.
Starting from the next post, we will continue the lessons with Chapter 2, covering the actual use of Cubase.
Thank you.