

Pro Tools Tutorial – Getting Started Lesson 5 – Preferences (1)
2024.04.17·AVID Pro Tools·11 min readMUZIUM
Also available in:
English···
AVID Pro Tools Tutorial - 'Getting Started' Series, Lesson 5
Today's Topic: Preferences
Date Written: April 16, 2024
Computer Environment Used for This Tutorial
Apple MAC Studio M1 Max, 32GB (2022)
13.6.4 Ventura
Pro Tools Ultimate 2024.03
Mac OS is set to English. Pro Tools will also be covered in English.
Pro Tools Preferences
Today's topic will be a tutorial on Pro Tools Preferences.
Please note that this is not simply about the Setup menu in the Pro Tools menu bar.
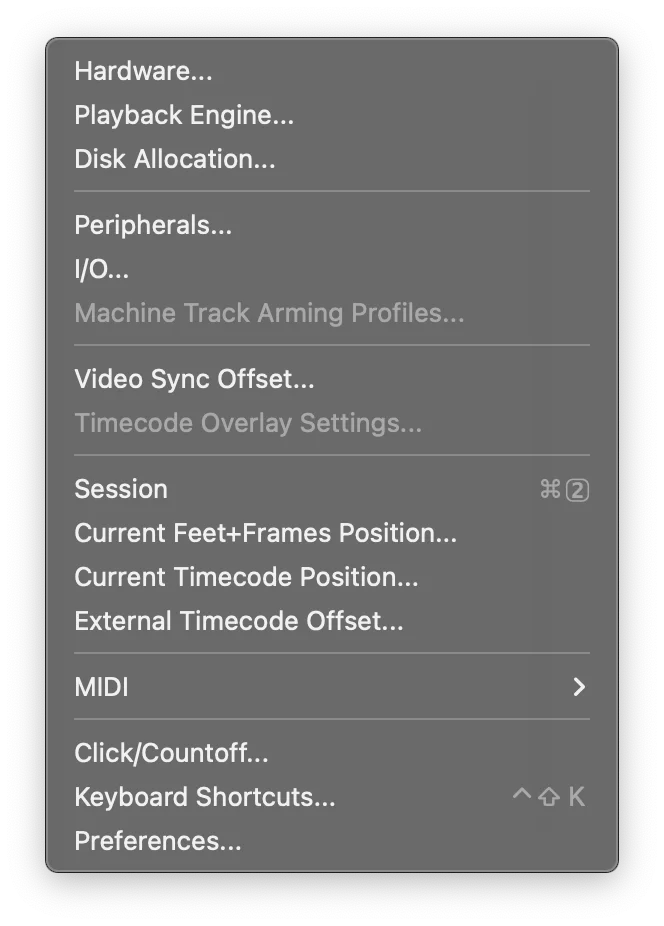
For reference, Preferences are located in the Pro Tools menu bar under Setup — at the very bottom.
Display
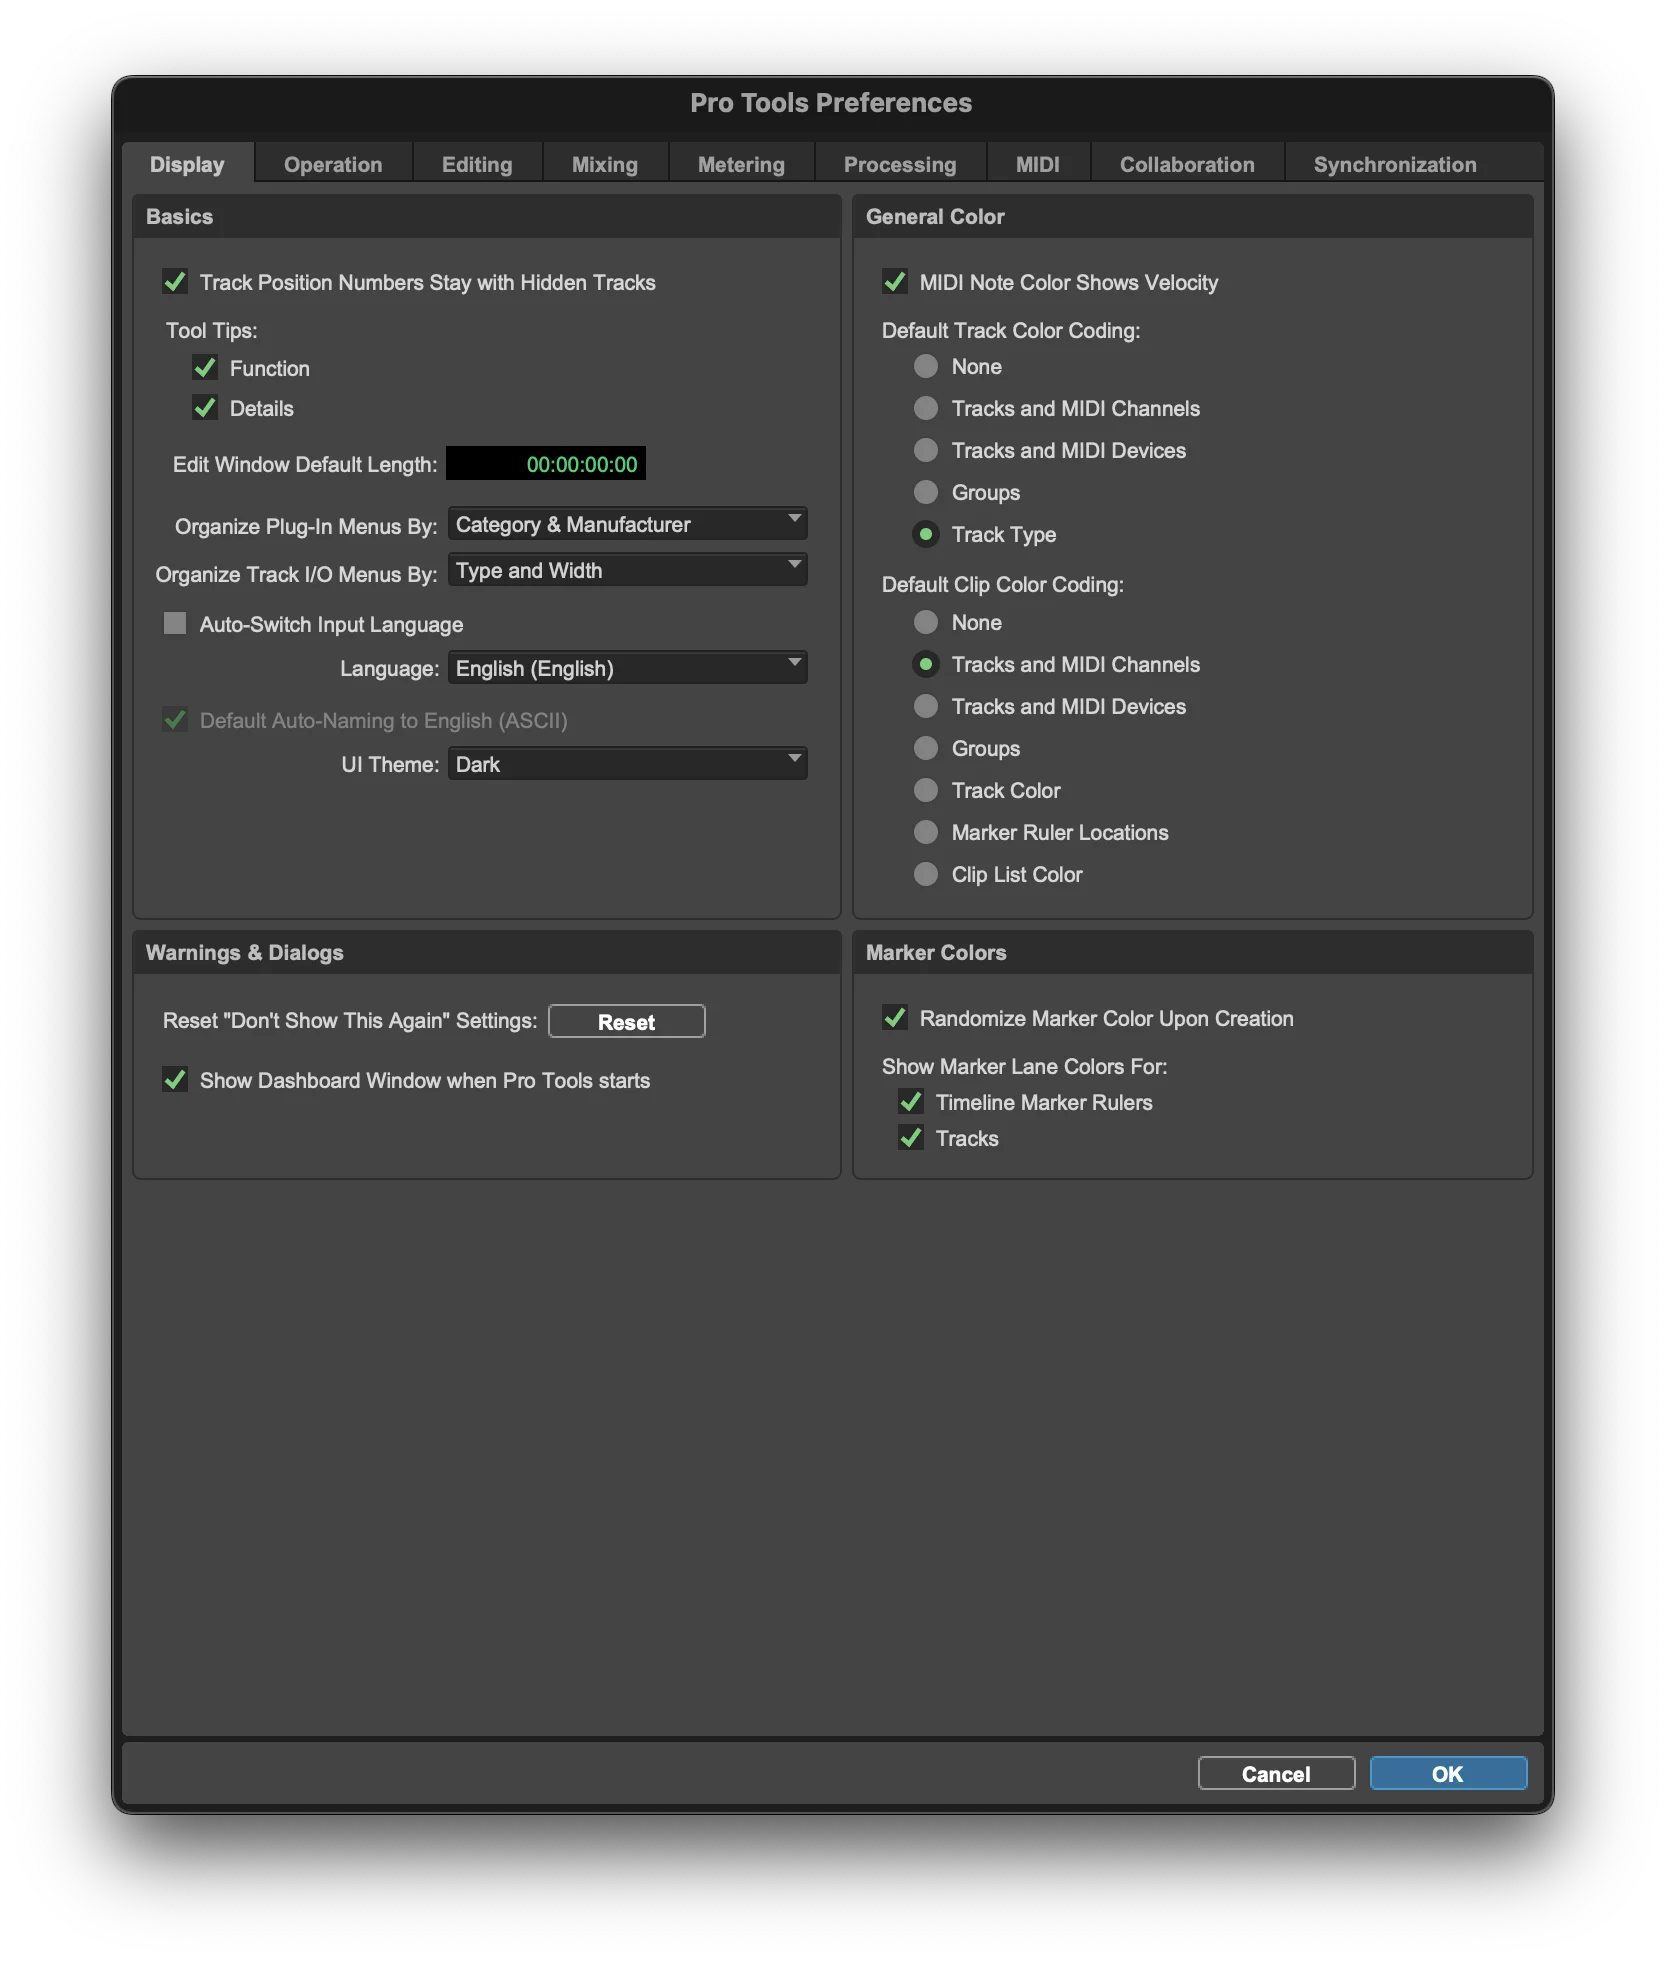
This is the first screen you'll see. We'll go through it clockwise: Basic - General Color - Marker Colors - Warnings & Dialogs.
Basic
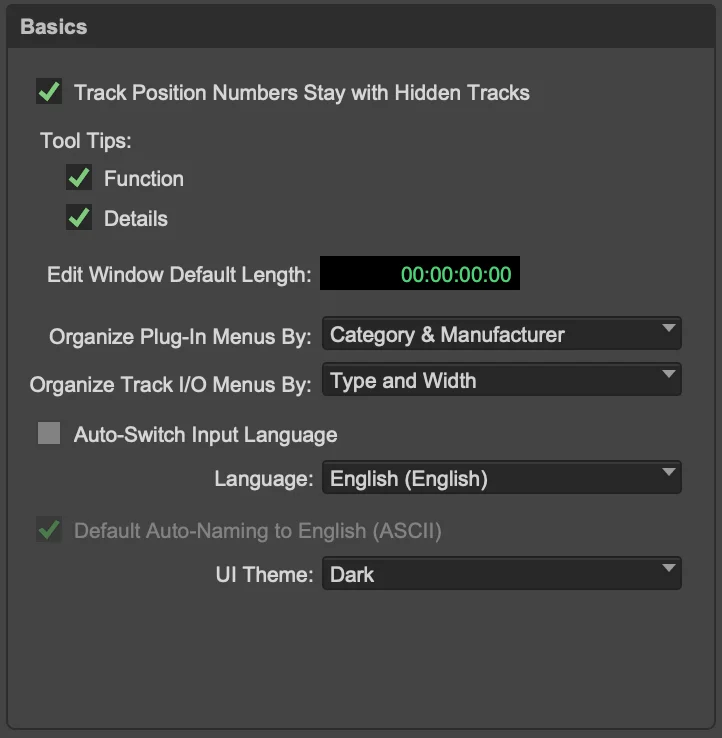
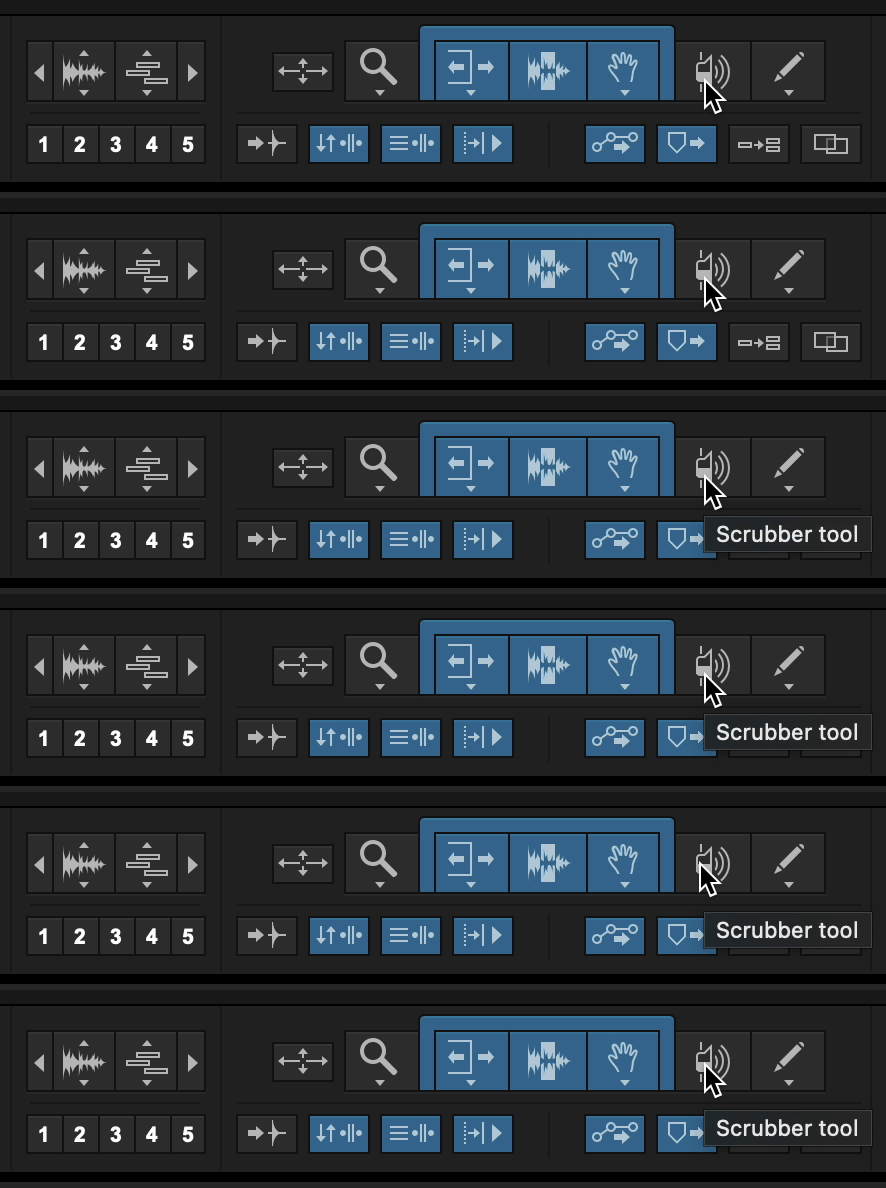
What the Tool Tips mean
Track Position Numbers Stay with Hidden Tracks
This option sets whether Pro Tools' track counter includes hidden tracks in its count or excludes them.
Tool Tips On/Off
While it sounds like a help feature, it actually shows you the names of icon-only buttons, so you should not turn it off.
Edit Window Default Length
You can set the default length of your project, but there doesn't seem to be much need to touch this.
Organize Plugin / Track I/O Menu
This option lets you choose how plugins are sorted. It is recommended to enable both Category and Manufacturer.
For the Track I/O Menu as well, enabling both options is better for visibility and quick navigation.
Language
Since translations are not perfect, English is strongly recommended.
UI Theme
You can choose the overall UI theme color. These days, black is the trend.
General Color, Marker Colors
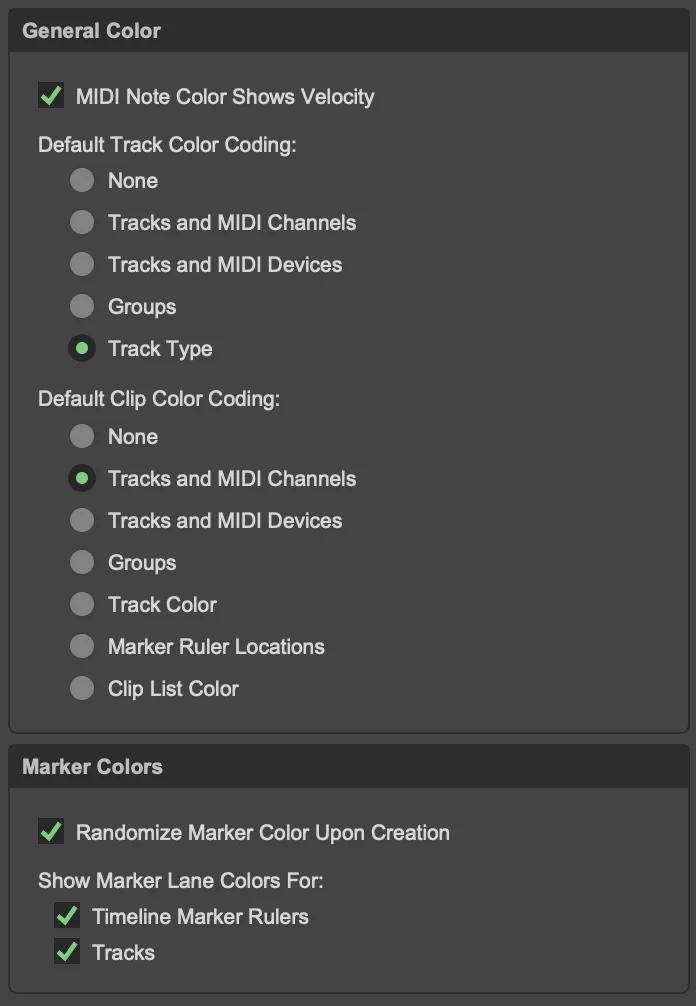
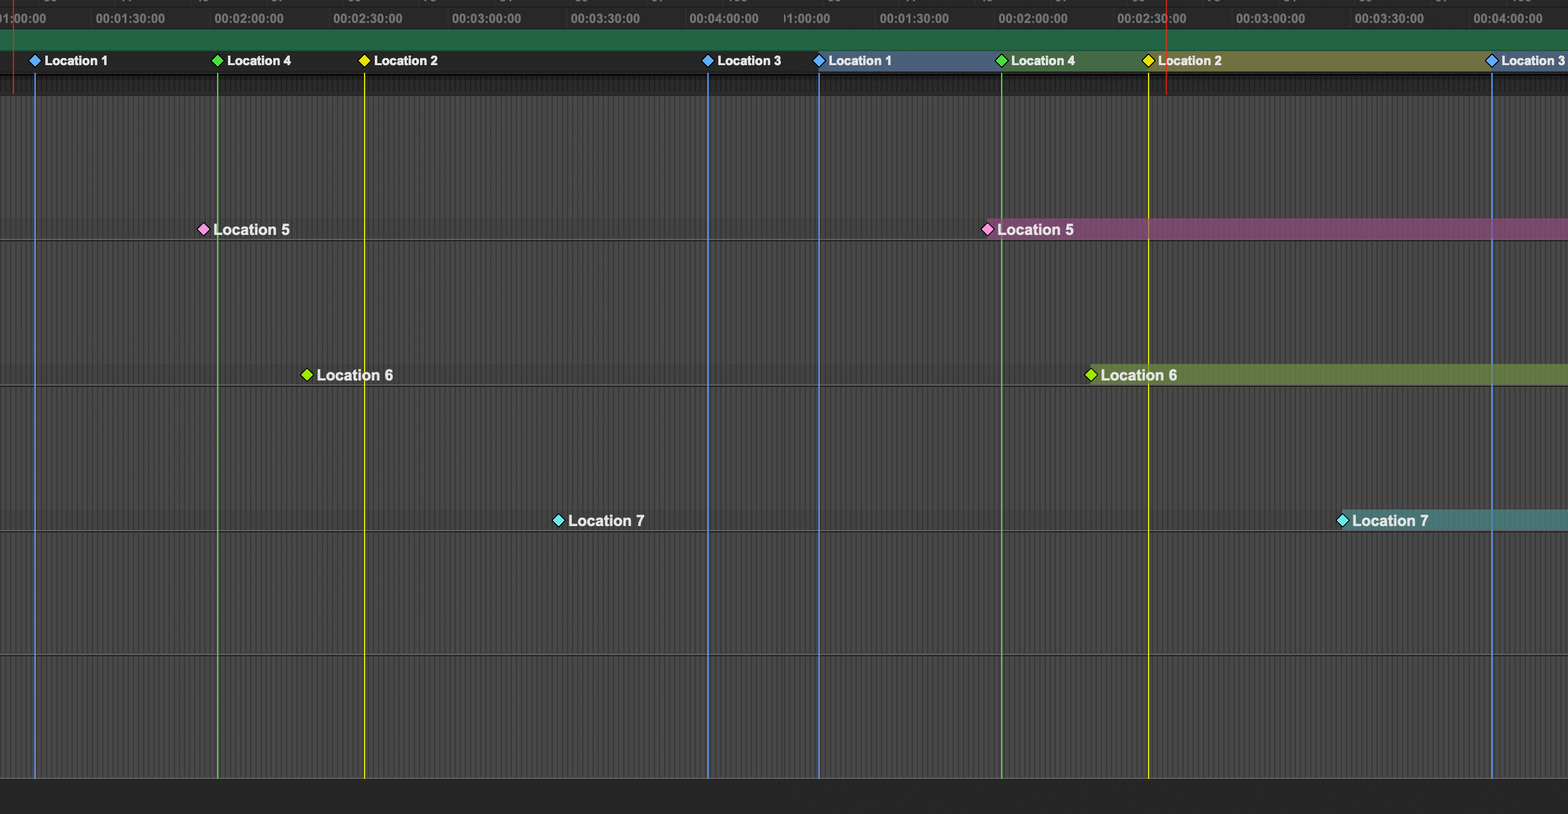
These are all options related to colors.
For General Color, the current state is the default. Personally, I don't find it very meaningful since I manually assign colors whenever I need to change them.
Below, you can specify colors for Markers.
There is a difference as shown in the image beside it… but enabling it is better for visibility, right?
The last menu, Warnings & Dialogs, is for resetting warnings you dismissed with 'Don't Show Again,' and for setting whether the Dashboard pops up when Pro Tools launches.
Operation
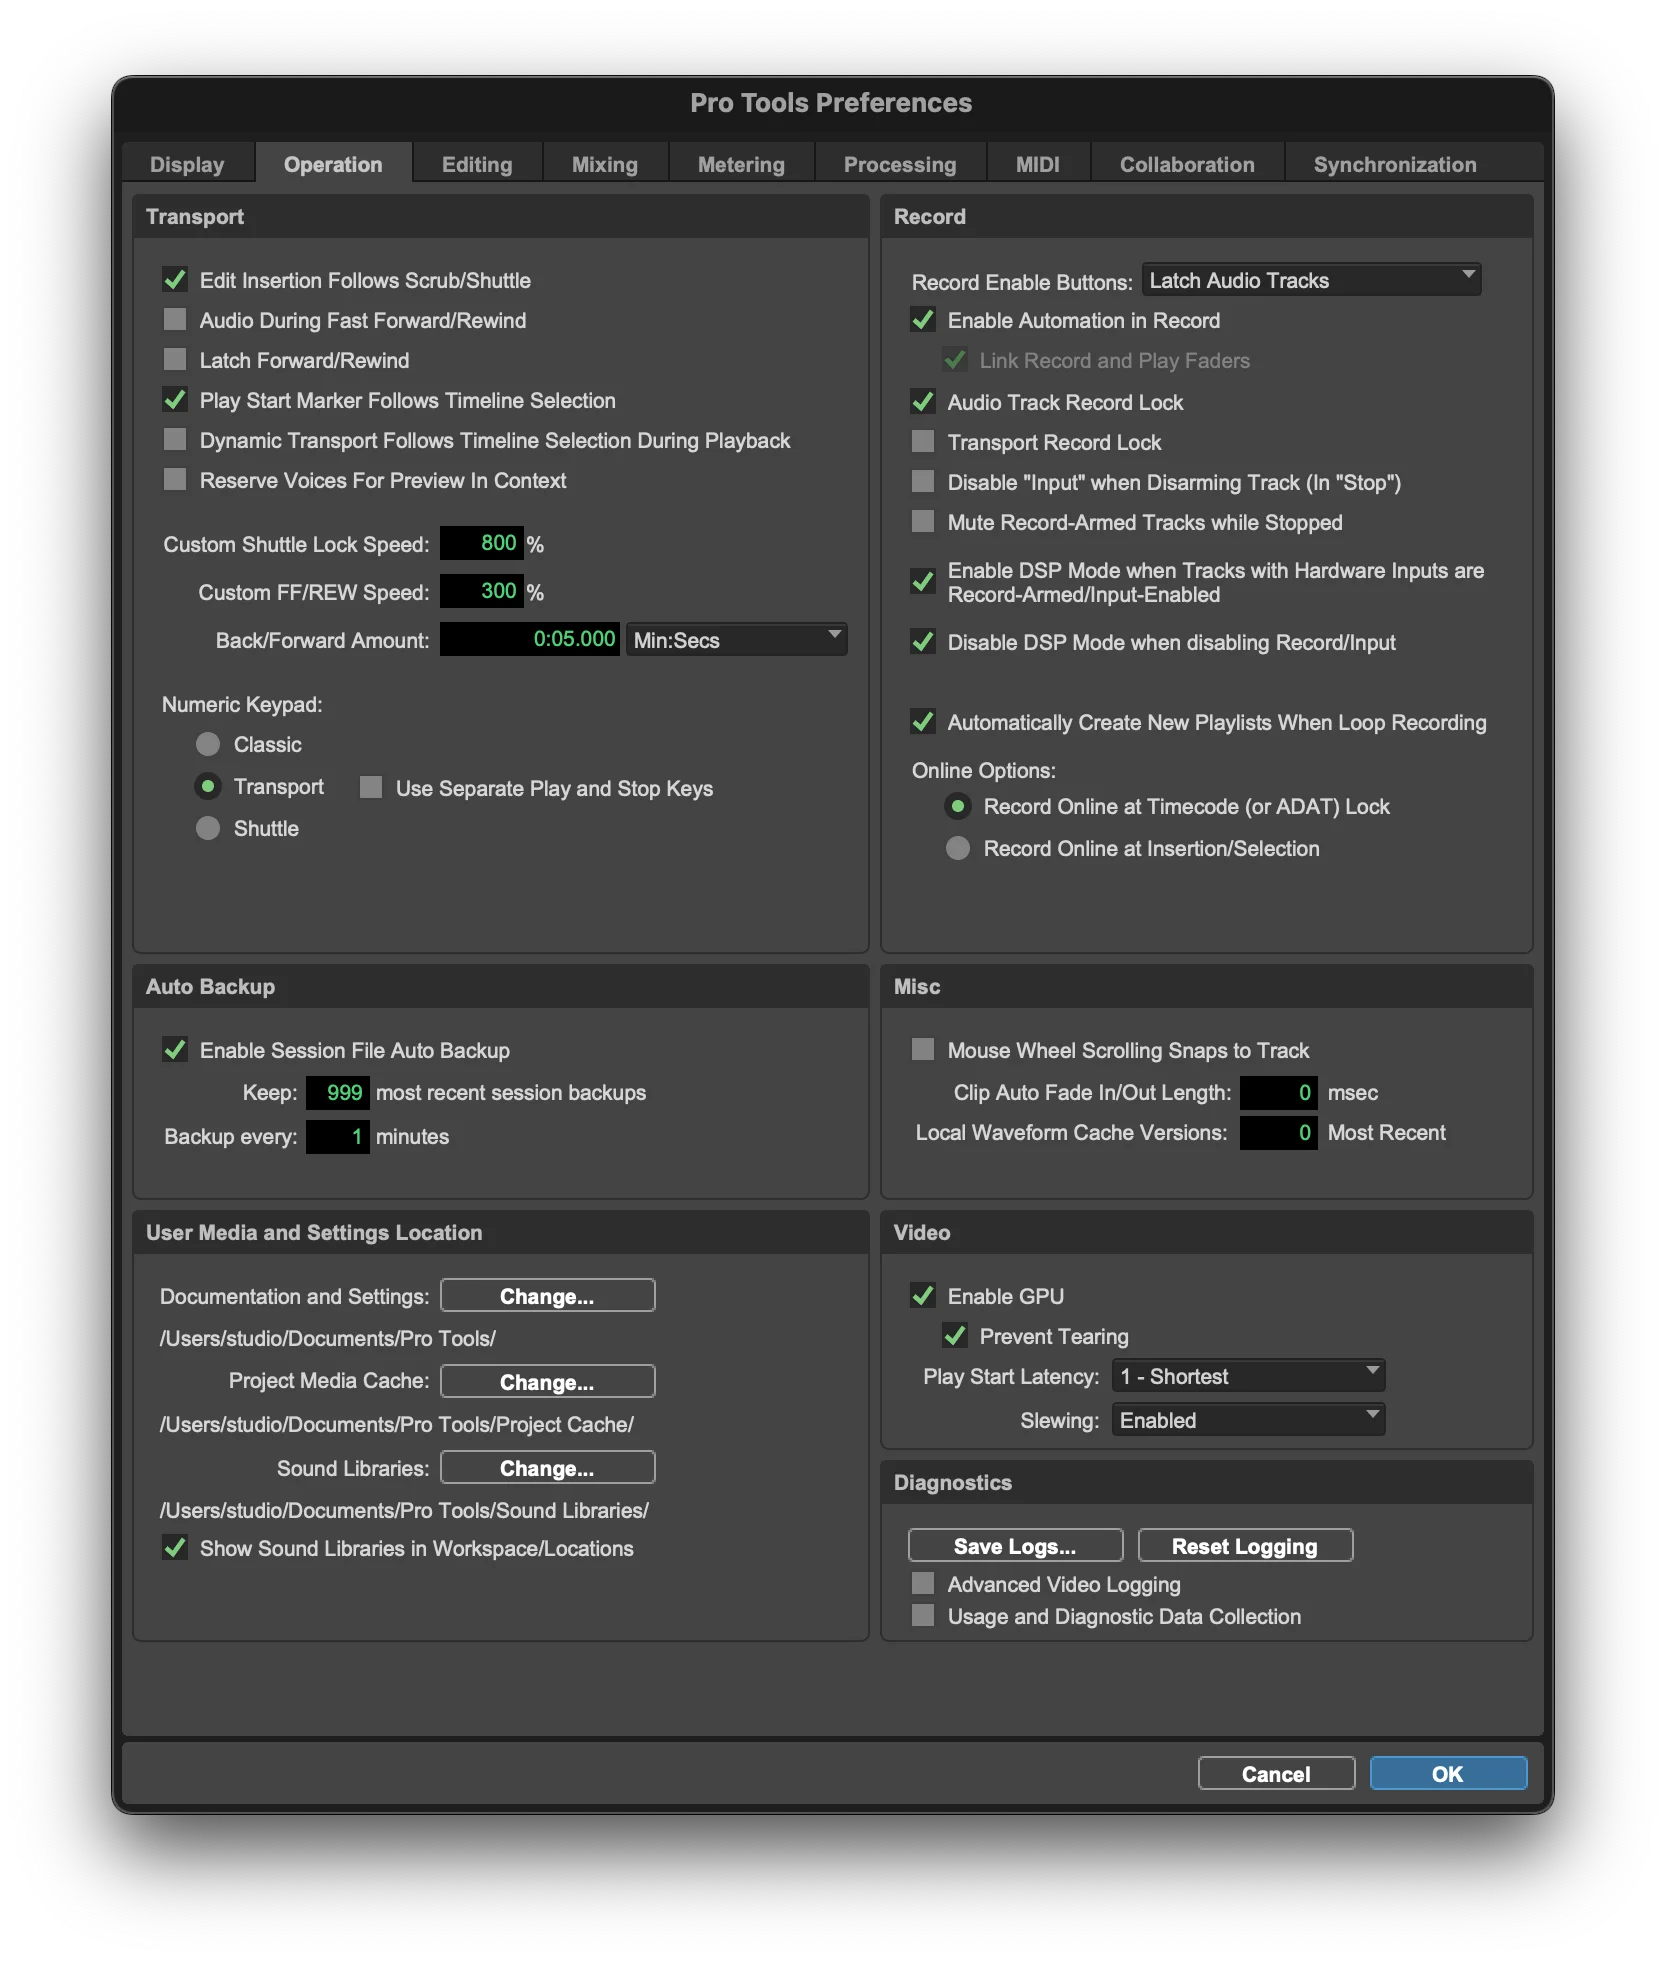
Transport
Most Transport options are heavily used in Post Production work.
Edit Insertion Follows Scrub/Shuttle
This sets whether the edit cursor (always blinking) follows during Scrub and Shuttle functions, or stays at its original position. Typically, you'd leave this on while working. (Note: Scrub is the speaker icon among the tool icons.)
Audio During Fast Forward/Rewind
This option sets whether audio plays back during fast forward and rewind. Since I rarely use fast forward or rewind, I leave this at its default disabled state.
Latch Forward/Rewind
This option makes fast forward and rewind function only while the key is held down.
Play Start Marker Follows Timeline Selection
Clicking a marker during playback will ignore the current record/playback position and begin playback from that location. If you're running a studio, this is an option to be extremely careful with.
Dynamic Transport Follows Timeline Selection During Playback
When Dynamic Transport is enabled, this option sets whether playback follows the selection point during playback. Since Dynamic Transport will be explained later, we'll skip it for now.
With this option enabled, playback will automatically start at the selected region each time you make a selection.
Reserve Voices For Preview In Context
Voices are a feature exclusive to Pro Tools HDX hardware, and nowadays there's rarely a need to worry about Voices.
The settings that follow relate to fast forward/rewind speed, jog wheel speed, and similar parameters.
Numeric Keypad
You can choose what shortcut function the numeric keypad serves; by default, it is used for Transport.
Classic Mode is a mix of multiple modes, and Shuttle mode is for fast forward/rewind.
Record
Record Enable Buttons
You can configure the record-enable button in three ways. Generally, Latch Audio Tracks is the most commonly used setting.
Latch — Each track operates independently.
Cancel — You can deactivate one previously enabled track, or deactivate all enabled tracks at once.
Enable Automation in Record
This allows Automation to be enabled during recording. It's extremely convenient for live mixing situations such as podcasting.
Audio Track Record Lock
When not enabled, record-arming is one-time only — once you record, the record-arm turns off. (Under normal circumstances, it's correct to have this option enabled.)
Transport Record Lock
I haven't been able to fully understand its exact purpose and concept, but it affects the use of buttons such as Play and Record. When this feature is enabled, it seems that the next recording is disarmed when recording is physically interrupted.
Disable "Input" When Disarming Track (In "Stop")
The label says "Input," which can be misleading — it actually refers to Input Monitoring. When this option is enabled, Input Monitoring is automatically turned off when a track is disarmed.
Mute Record-Armed Tracks while Stopped
With this option enabled, record-armed tracks are muted when not recording or playing back. This operates independently from the track's own Mute button.
Enable DSP Mode When Tracks with Hardware Inputs are Record-Armed/Input-Enabled
This menu is only visible with interfaces that have DSP. You can set whether to automatically use DSP functionality.
Disable DSP Mode When disabling Record/Input
Just like the option above, this automatically turns off DSP mode.
Automatically Create New Playlists When Loop Recording
This option automatically creates a new playlist when Loop Recording. Without this feature, only the last take will be visible.
Regardless of this option, all recorded files are saved to the Clip List.
Online Options
These are options selected when working online in sync with another system (e.g., Pro Tools Satellite).
Misc, Video, Diagnostics
Mouse Wheel Scrolling Snaps to Track
This sets whether vertical scrolling always snaps to track increments. Personally, I find it much more convenient to leave this off.
Clip Auto Fade In/Out Length
This automatically applies a fade-in and fade-out to clips to prevent pop noise and similar artifacts. It doesn't apply permanently — it only affects playback — and can be set up to a maximum of 10 msec. It is recommended to turn this off for accurate monitoring.
Local Waveform Cache Versions
This option lets you set how many waveform images to keep stored, though it doesn't have much practical impact.
Enable GPU
This option enables GPU usage, literally. There's no need to turn it off.
Prevent Tearing
Disabling this option introduces a 1-frame delay, as far as I know. It's best to keep this on at all times.
Play Start Latency
This is the video playback latency. If you have a heavy processing load, it's better to increase this value.
Slewing
When sync is off, this option duplicates or drops video frames to maintain synchronization as closely as possible. Enable it by default, but turn it off if you experience errors during video playback.
Auto Backup, User Media and Settings Location
For backup, you can simply set whether to back up, how many backups to keep, and at what interval. Since only session data is backed up (not audio files), the storage size is very small — so setting it to 999 backups at every minute, as shown in the image, lets you maintain backup data across virtually every stage of your work.
For the User Library, you can set the default working folders for Pro Tools — it's generally best to leave these at their default values.
Edit
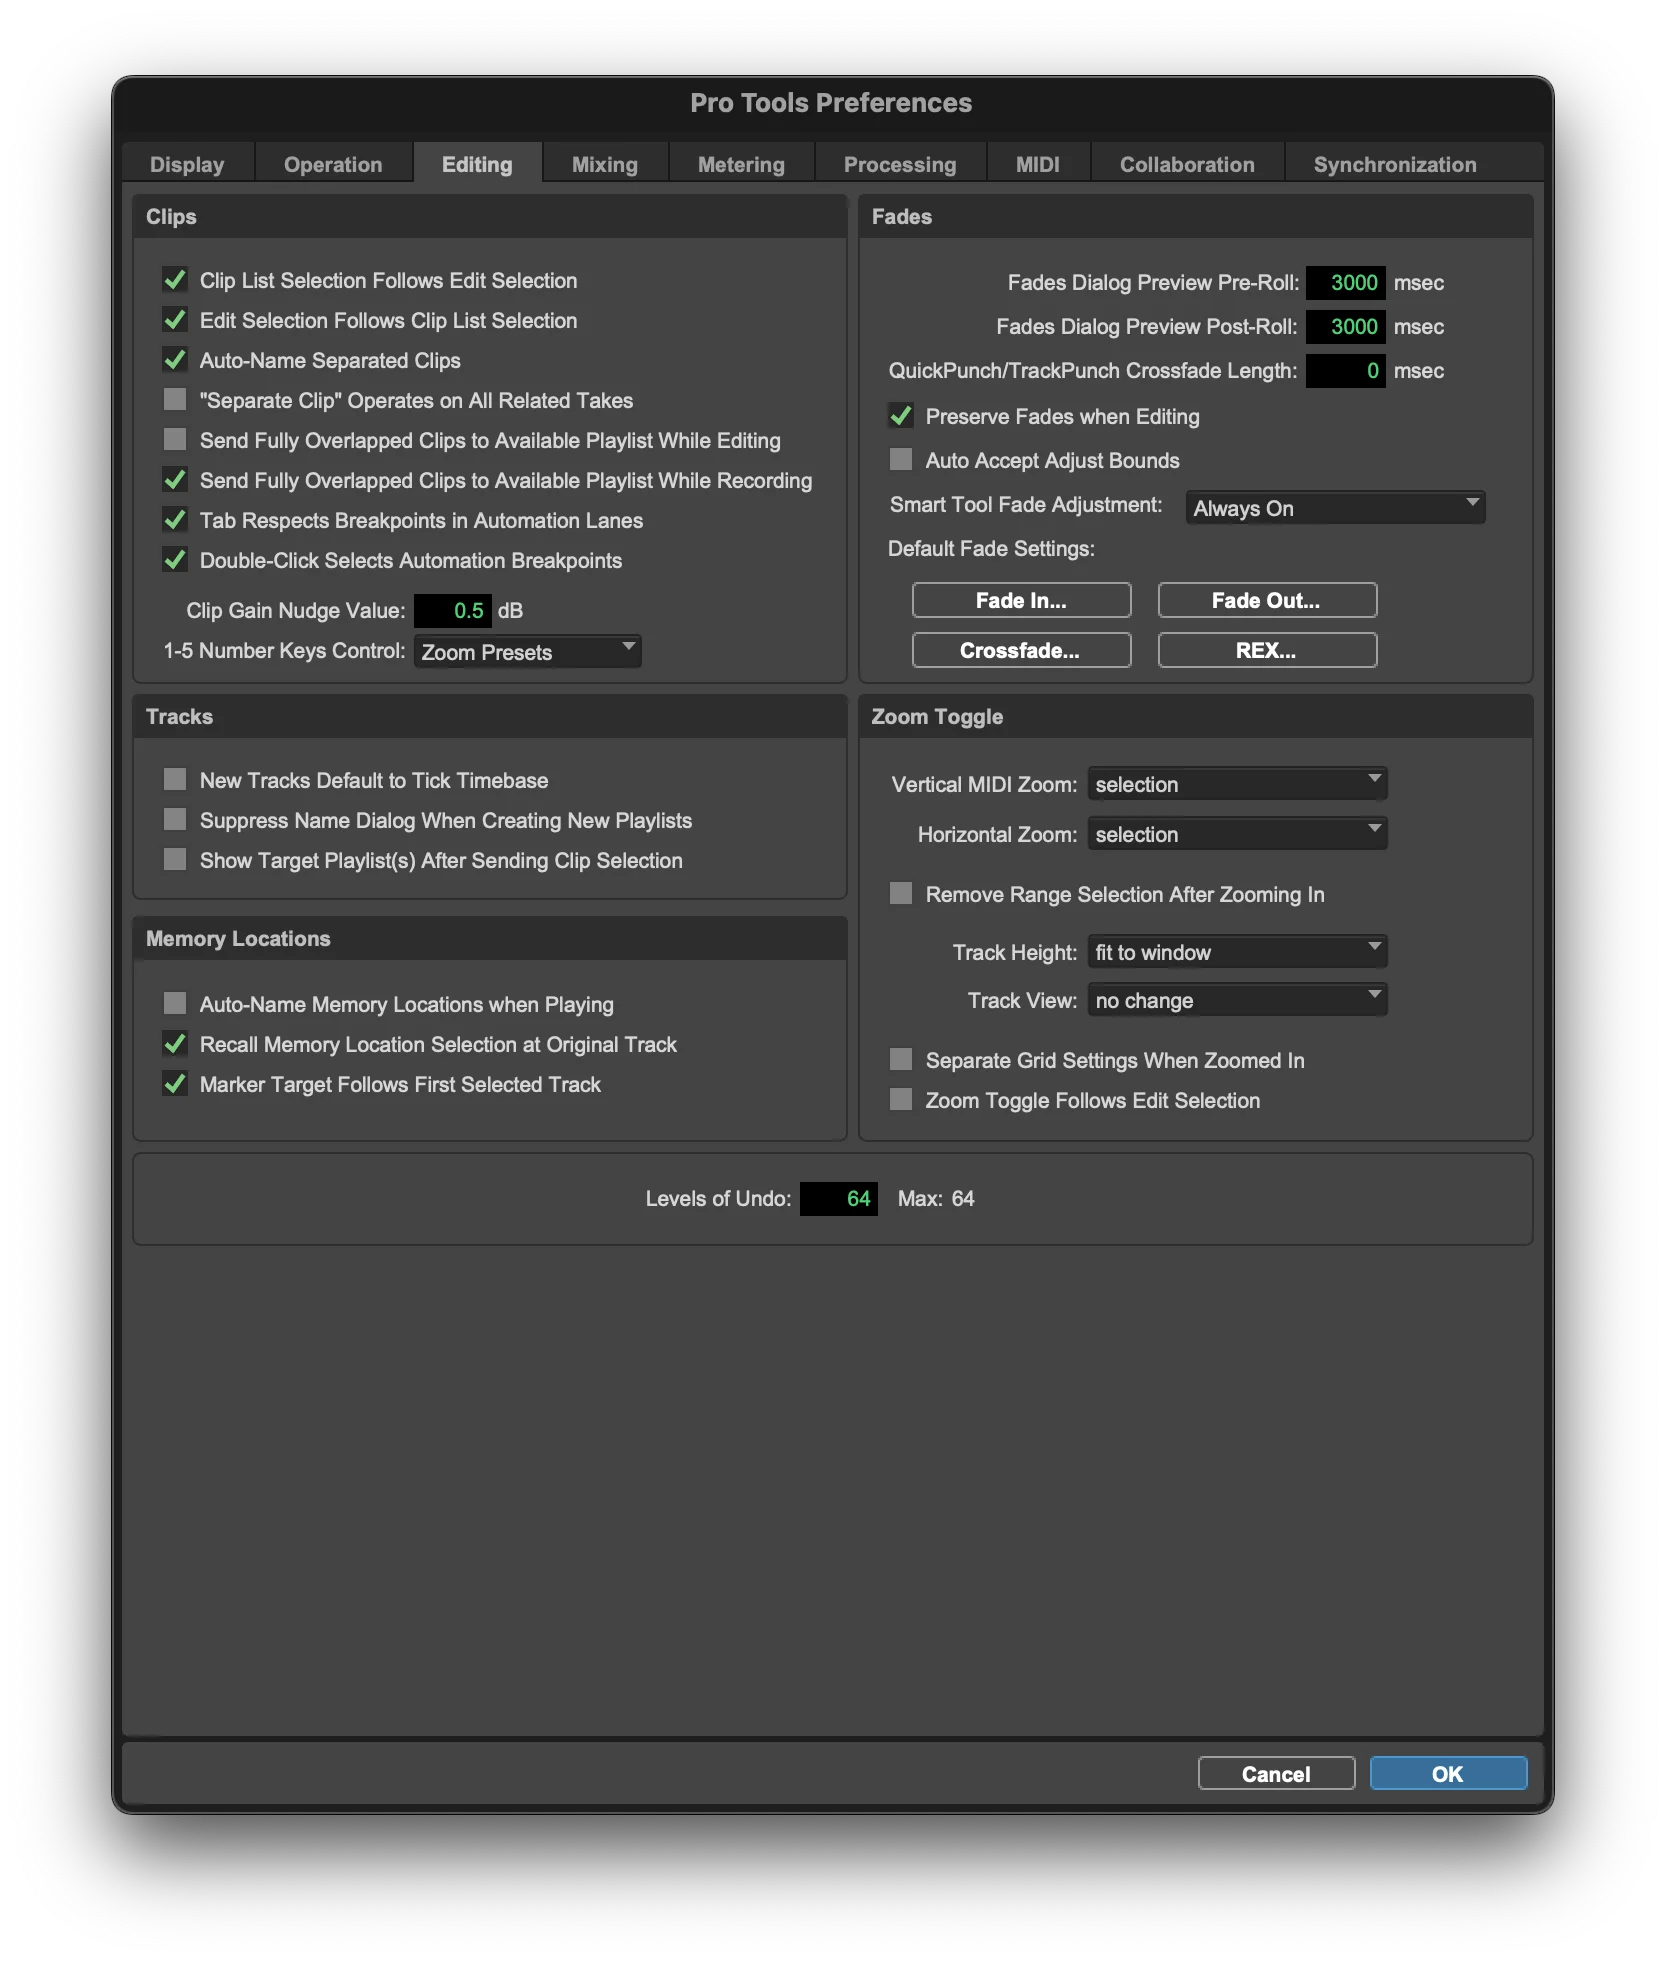
Clips
Clip List Selection Follows Edit Selection
This option synchronizes the selection in the Clip List panel on the right side with whatever is selected in the main Edit window.
Edit Selection Follows Clip List Selection
This is the reverse of the option above. Both options should be enabled so you can quickly locate clips from either the Clip List or the Edit Window.
Auto-Name Separated Clips
This option automatically assigns a name to clips that have been separated.
If this option is disabled, the naming popup appears not when using the basic Separate command (shortcut [B]), but when using the Separate with a defined range (shortcut [CMD]+[E]).
"Separate Clip" Operates on All Related Takes
This option helps you edit related clips simultaneously based on timecode… However, despite testing it in various ways to create this tutorial, I was unable to find a single instance where it actually worked. It didn't work even when recording simultaneously or using Loop Recording.
Send Fully Overlapped Clips to Available Playlist While Editing
During editing, if a take is completely overlapped (it must be completely overlapped), the existing clip underneath is automatically moved to a playlist.
Send Fully Overlapped Clips to Available Playlist While Recording
During recording, if a take is completely overlapped (it must be completely overlapped), the existing clip underneath is automatically moved to a playlist. Unlike the feature above, this one is strongly recommended to keep enabled.
Tab Respects Breakpoints in Automation Lanes
Normally, pressing Tab moves to the start or end of a clip, or by Transient. With this option enabled, it will also navigate to any automation breakpoints present.
Double-Click Selects Automation Break Points
This allows you to select the area between specified automation values with a double-click. Always recommended to have this enabled.
Clip Gain Nudge Value
This is the default increment when adjusting Clip Gain using a keyboard shortcut.
1-5 Number Keys Control
This option lets you define how the keyboard number keys 1–5 are used.
You can choose between Zoom and Clip Effect. The default is set to Zoom.
Fade
Fade Dialog Preview Pre-Roll / Fade Dialog Preview Post-Roll
Surprisingly, the Fade Dialog has a preview function, and these settings are used for that.
Quick Punch/TrackPunch Crossfade Length
This lets you automatically set a Crossfade when Punch Recording. It's convenient, but personally I don't use it as it reduces visual clarity.
Preserve Fade when Editing
This option retains existing Fade data when editing. With this enabled, for example, if you separate a Crossfade back into individual clips, Fades will remain at those positions.
Auto Accept Adjust Bounds
When applying Fades numerically using Batch Fade or similar tools, a dialog appears asking what to do if the value is too short or too long. This option determines whether that dialog is shown. When enabled, Fades are always applied automatically and adjusted to fit.
Smart Tool Fade Adjustment
When this option is enabled (Always on), you can adjust the Fade curve without any special configuration while using the Smart Tool.
Default Fade Settings
Here you can configure the default settings for Fades.
Tracks
New Tracks Default to Tick Timebase
Normally, new tracks are created with a Sample Timebase, but enabling this option changes them to Tick-based.
Suppress Name Dialog When Creating New Playlists
Normally, creating a new Playlist via New Playlist prompts you for a name. Enabling this option automatically assigns a name.
Show Target Playlist(s) After Sending Clip Selection
I have not been able to determine the purpose of this option yet — I will document it as soon as possible.
Memory Locations
Auto-Name Memory Locations when Playing
When enabled, markers added during playback are automatically named Marker 1, Marker 2, and so on. This is useful when adding markers while listening to a song.
When this is disabled and you type a name manually, the marker is placed not at the moment you press Enter, but at the moment you finish typing the name and click OK.
Recall Memory Location Selection at Original Track
I have not been able to determine the purpose of this option yet — I will document it as soon as possible.
Marker Target Follows First Selected Track
When this option is enabled, the marker target always follows the currently selected track.
Zoom Toggle
For reference, Zoom Toggle is triggered by pressing the shortcut key [E].
Vertical MIDI Zoom, Horizontal Zoom
Both Vertical Zoom and Horizontal Zoom are options for setting what they snap to, but most users leave them at their default values.
Remove Range Selection After Zooming In
If you want to automatically deselect the selected range when using Zoom Toggle, use this option.
Track Height, Track View
Both Track Height and Track View can be configured to determine how they appear when Zoom Toggle is activated. Again, most users keep the defaults.
Separate Grid Settings When Zoomed In
With Zoom Toggle, you can set the grid value differently from the default view.
For example, you might view by bar normally, and then switch to 16th notes when toggled in. This is a very useful feature.
Zoom Toggle Follows Edit Selection
I have not been able to determine the purpose of this option yet — I will document it as soon as possible.
Levels of Undo
This option sets how many steps of undo history are retained. Naturally, set it to the maximum of 64.
Closing Thoughts
There is a lot to cover regarding Preferences, so this topic will be split into Part 1 and Part 2.
Thank you.